Welcome to our Support Portal. Search for answers using the search box below, or create a support ticket if you cannot find your answer.
-
Repairing a Lamp?
-
Product Info
-
-
- Installing Arditi Brand Metal E27 Lampholder's
- How to unlock my ES & SES Lampholder
- Installing Arditi Brand Plastic E27 lampholder's
- How to install our push fit E27 and E14 lampholders
- Wiring an E27 Pull cord Lampholder
- Wiring an E27 Switched Lampholder
- Installing S.Lilley Brand Metal E27 Lampholders
- How to Install our Lampholder Cup and Cord Grip
- Lampholder Bases explained
-
- Wiring A BC Un-Switched Lampholder
- Wiring An S.Lilley BC Switched Lampholder
- Wiring a Plastic BC Lampholder
- Installing the 40mm BC 4 Part Lampholder
- Wiring the BC Push Wire Plastic Snap on Cap Lampholder
- Safer switched lampholder not working
- Aligning a BC Unswitched Lampholder
- Lampholder Bases explained
-
-
- Kit 33 Installation Guide
- Kit 17 Installation Guide - ES Version
- Kit 32 Installation Guide
- Kit 21 Installation Guide
- Ceramic Side Entry Wiring Kit with a ES | E27 | Edison Screw Lampholder
- Ceramic Side Entry Wiring Kit with Unswitched BC | B22 Lampholder
- Kit 18 Installation Guide
- Kit 15 Installation Guide
- Kit 35 Installation Guide
- Plastic Wooden Table Lamp Fixing Kit With Backplate and Cover - BC Version
- Plastic Wooden Table Lamp Fixing Kit With Wood Nipple – BC Version
- Kit 12 Installation Guide
- Kit 11 Installation Guide
- Kit 8 Installation Guide
- Kit 1 Installation Guide
- Kit 21 Components
- Show Remaining Articles ( 1 ) Collapse Articles
-
-
Creating a Lamp?
-
- How to fix or install a lampholder onto a ceramic item with limited hand access.
- How to turn a bottle into a light fitting
- Measuring Bottle Hole For Bung Size
- Converting a Hong Kong Paraffin Lamp into a Table lamp
- Installing our ceiling roses
- How to Convert a Gas Blow Torch Into a Light Fitting
- How to repair a light that has a lamp inside and outside
-
-
Videos
Ceramic Side Entry Wiring Kit with Unswitched BC | B22 Lampholder
0 out of 5 stars
| 5 Stars | 0% | |
| 4 Stars | 0% | |
| 3 Stars | 0% | |
| 2 Stars | 0% | |
| 1 Stars | 0% |
This is a step by step guide on how to install the Ceramic Side Entry Wiring Kit with BC | B22 Lampholder.
- 1 x BC | B22 | Bayonet Cap Lampholder
- 1 x Cable Cord Set
- 1 x Side Entry Cord Grip
- 1 x Nut Cover
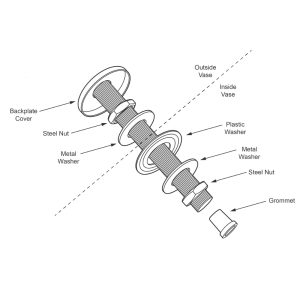
- 2 x Steel Nuts
- 2 x Metal Washers
- 1 x Plastic Washer
- 1 x Allthread Rod
- 1 x Grommet
- 1 x Flex Strain Relief – Not Required
Note: You won’t require the flex strain relief to install this kit. You can simply discard this part or keep hold of it for a future project.
1 Step 2
Push the above assembly up through the hole in your vase/item so that it is sticking out the top of the vase/item. Ensure to keep hold of it once it is sticking out the top as you don't want it to fall down, alternatively, if you can lay the vase/item on its side this may help.
Once the assembly is sticking out the top, take the second metal washer and slide it onto the rod, followed by the second steel nut.
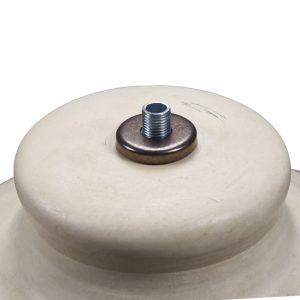
Next you have to tighten up the nuts, but before you do this you will need to ensure you have the correct length of thread sticking out the top. This should be around 6mm.
Once you have the correct amount of thread sticking out the top you can tighten up the nuts, in most cases you can get away with holding the nut from the inside whilst you get a spanner on the nut on top.
2 Step 3
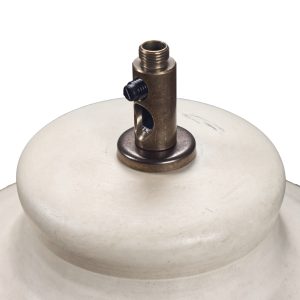
After the assembly is nice and tight, you can slide the nut cover over the top, leaving approximately 6mm of thread still sticking out. Then you can take the side entry cord grip and screw it onto the thread.
Note: We recommend using a dab of superglue or loctite to prevent the cord grip from untwisting off the threaded rod.
1 Step 4
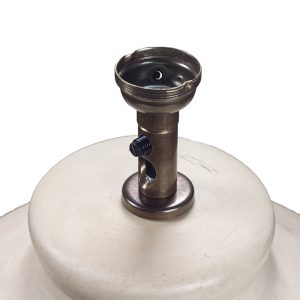
Take the lampholder and separate it into its 3 components, then take the bottom part (cap) and screw it onto the top of the side entry cord grip.
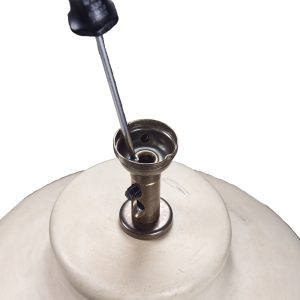
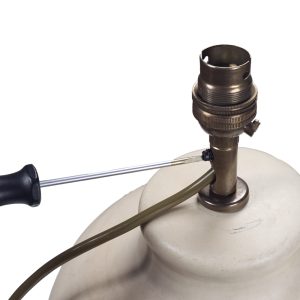
To make sure this is securely fixed in place, you must tighten the lock screw inside the cap of the lampholder. This is a safety feature to ensure the lampholder does not unscrew from the fixing on your lamp.
Note: You may need to unscrew the lock screw inside the cap of the lampholder in order for it to fully tighten and sit flush on the side entry cord grip.
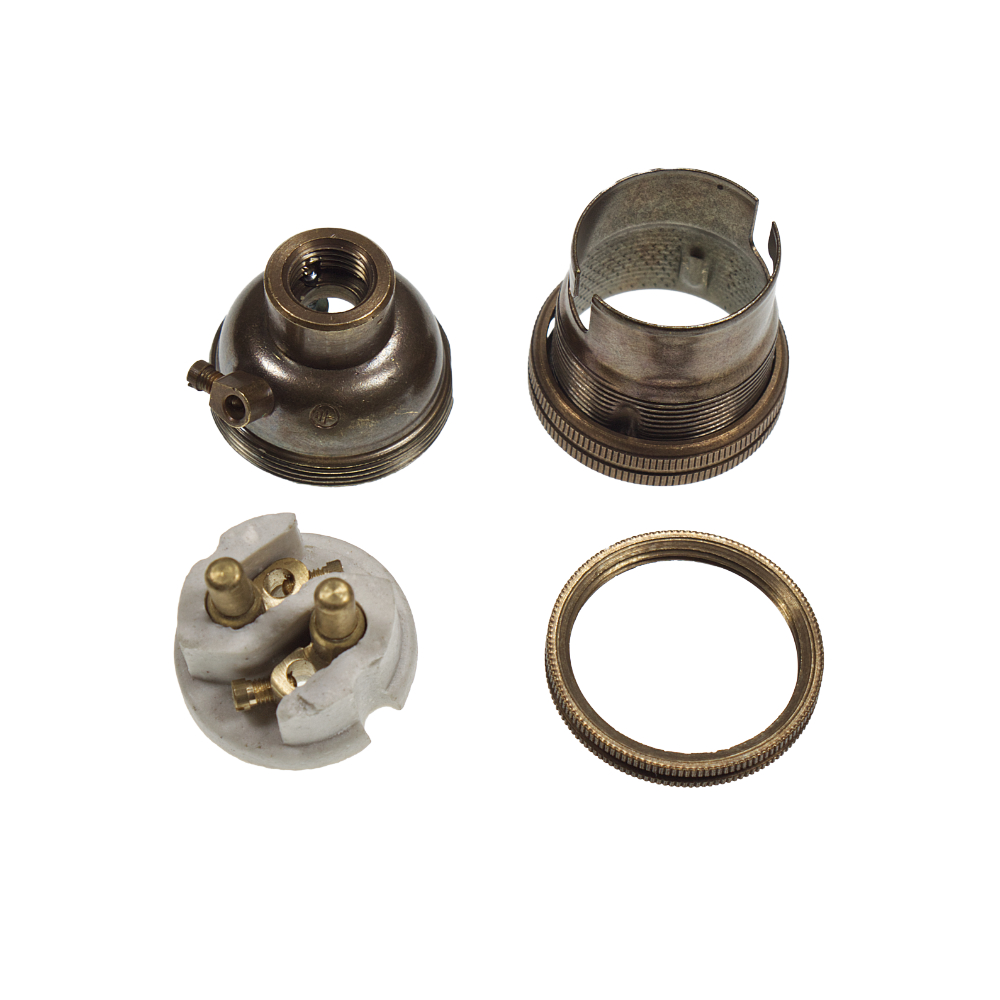
- Cap (Bottom Section)
- Skirt (Top Section)
- Lock Ring
- Connection Unit
- Shade Ring
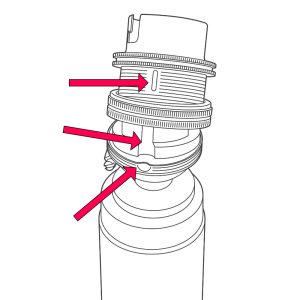
Separate the lampholder into the following parts:
1 Step 5
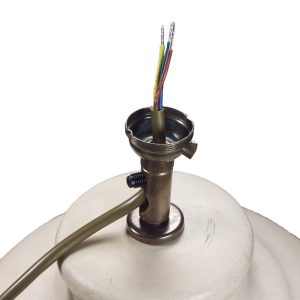
The next step is to insert the cable. To do this, push the cable up and through the side of the cord grip and out the cap of the lampholder.
Please note that it can be quite difficult to get the cable up and through the cord grip. This step can be done before attaching the cap of the lampholder if you find that it makes it easier.
2 Step 6
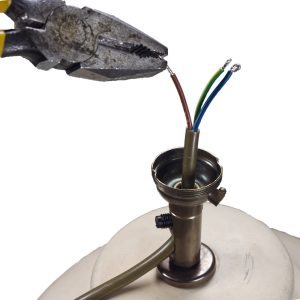
The next step is to wire the lampholder. First, using a pair of pliers, double over the ends of the cable.
Then wire the Earth (Yellow/Green) into the connection block on the side of the lampholder. After this, you then need to wire the insert.
It does not matter what way around, the Live (Brown) and Neutral (Blue) connect.
1 Step 7
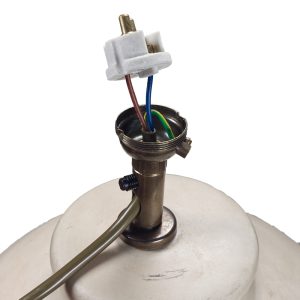
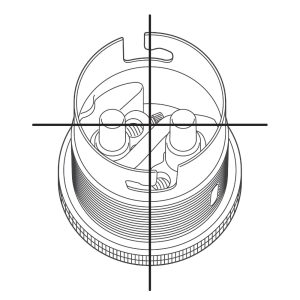
Once the connection unit had been connected up as shown above, you can then carefully push the connection unit inside the base of the lampholder ensuring the notches align as shown in the images below.
Once the connection unit is inside the base you can then take the skirt and again ensuring the notches align, place it over the top of the connection unit and tighten up the lock ring. You can then attach the shade ring.
More information on how the align the lampholder can be found here.
0 out of 5 stars
| 5 Stars | 0% | |
| 4 Stars | 0% | |
| 3 Stars | 0% | |
| 2 Stars | 0% | |
| 1 Stars | 0% |

