Welcome to our Support Portal. Search for answers using the search box below, or create a support ticket if you cannot find your answer.
-
Repairing a Lamp?
-
Product Info
-
-
- Installing Arditi Brand Metal E27 Lampholder's
- How to unlock my ES & SES Lampholder
- Installing Arditi Brand Plastic E27 lampholder's
- How to install our push fit E27 and E14 lampholders
- Wiring an E27 Pull cord Lampholder
- Wiring an E27 Switched Lampholder
- Installing S.Lilley Brand Metal E27 Lampholders
- How to Install our Lampholder Cup and Cord Grip
- Lampholder Bases explained
-
- Wiring A BC Un-Switched Lampholder
- Wiring An S.Lilley BC Switched Lampholder
- Wiring a Plastic BC Lampholder
- Installing the 40mm BC 4 Part Lampholder
- Wiring the BC Push Wire Plastic Snap on Cap Lampholder
- Safer switched lampholder not working
- Aligning a BC Unswitched Lampholder
- Lampholder Bases explained
-
-
- Kit 33 Installation Guide
- Kit 17 Installation Guide - ES Version
- Kit 32 Installation Guide
- Kit 21 Installation Guide
- Ceramic Side Entry Wiring Kit with a ES | E27 | Edison Screw Lampholder
- Ceramic Side Entry Wiring Kit with Unswitched BC | B22 Lampholder
- Kit 18 Installation Guide
- Kit 15 Installation Guide
- Kit 35 Installation Guide
- Plastic Wooden Table Lamp Fixing Kit With Backplate and Cover - BC Version
- Plastic Wooden Table Lamp Fixing Kit With Wood Nipple – BC Version
- Kit 12 Installation Guide
- Kit 11 Installation Guide
- Kit 8 Installation Guide
- Kit 1 Installation Guide
- Kit 21 Components
- Show Remaining Articles ( 1 ) Collapse Articles
-
-
Creating a Lamp?
-
- How to fix or install a lampholder onto a ceramic item with limited hand access.
- How to turn a bottle into a light fitting
- Measuring Bottle Hole For Bung Size
- Converting a Hong Kong Paraffin Lamp into a Table lamp
- Installing our ceiling roses
- How to Convert a Gas Blow Torch Into a Light Fitting
- How to repair a light that has a lamp inside and outside
-
-
Videos
How to repair a light that has a lamp inside and outside
0 out of 5 stars
| 5 Stars | 0% | |
| 4 Stars | 0% | |
| 3 Stars | 0% | |
| 2 Stars | 0% | |
| 1 Stars | 0% |
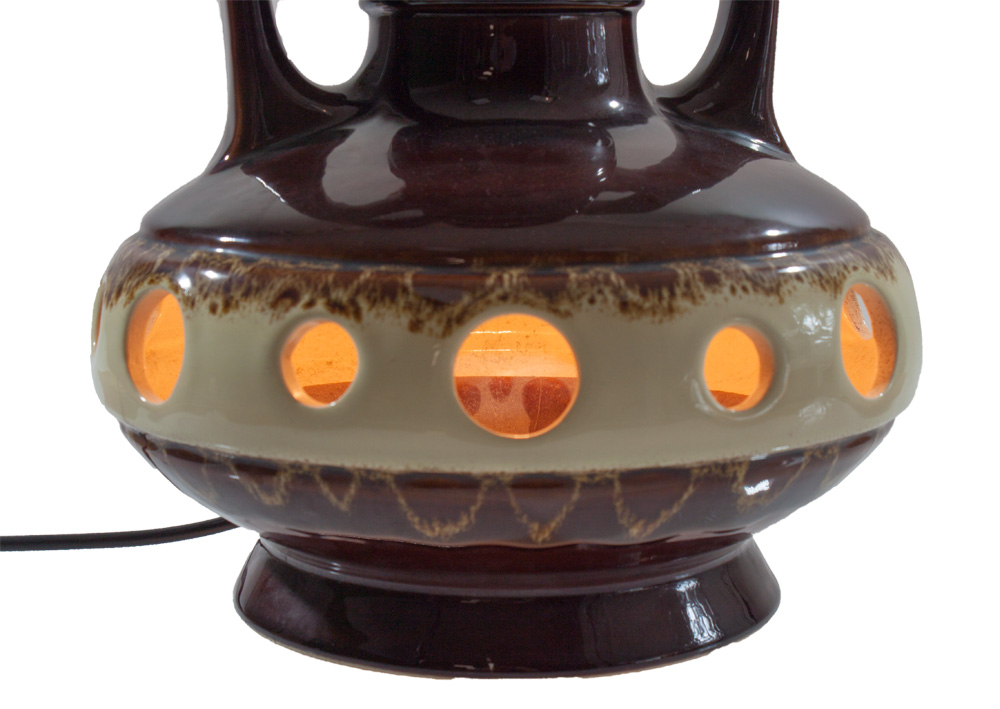
Commonly known as West German Lamps, these are popular lamps that have a lampholder inside and on top.
These style of lights come in all different shapes and sizes, so this guide below may not be exactly right but will be close enough to get an idea on how to make the lamp work.
Like the image below.
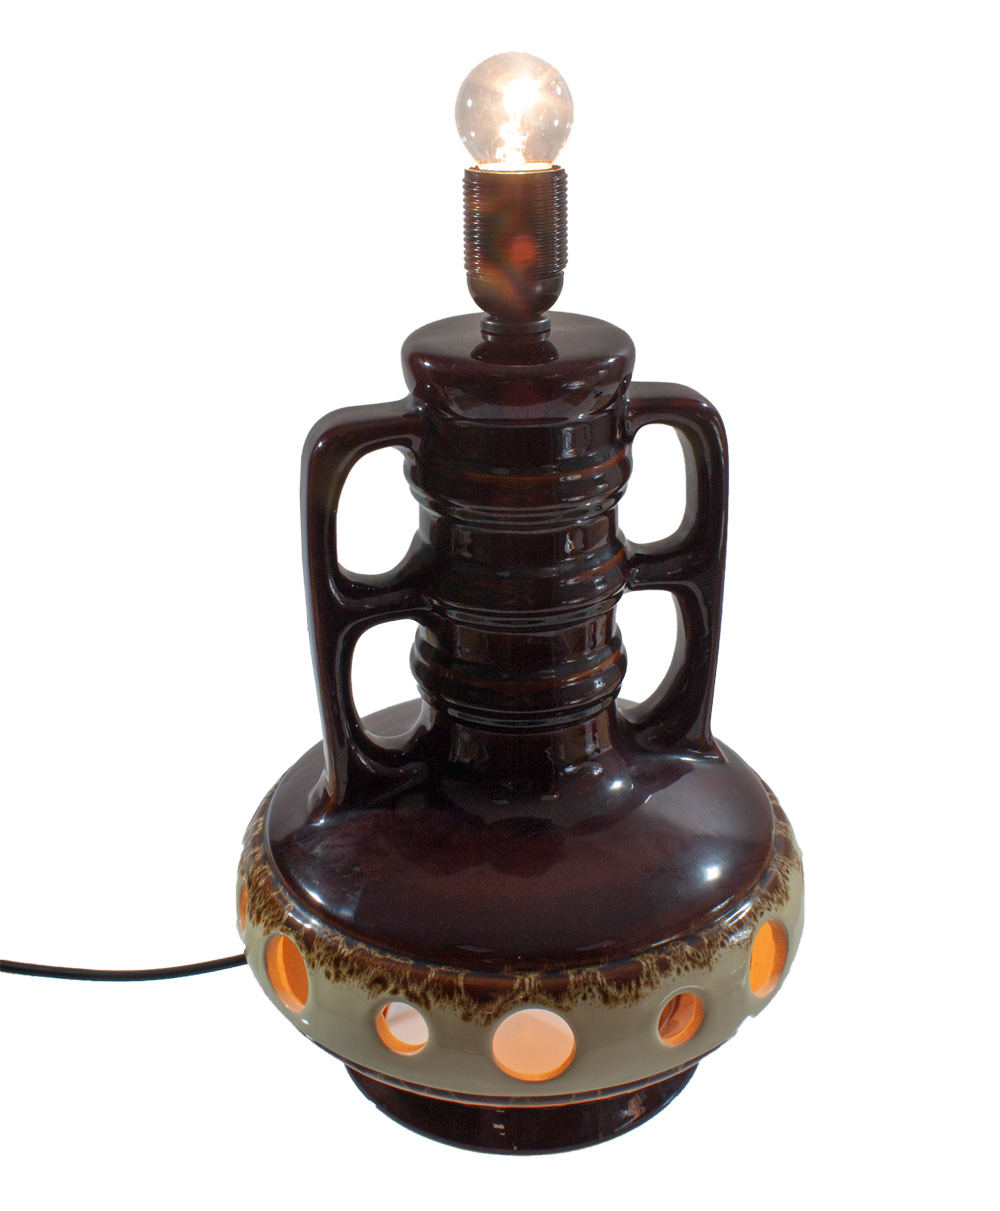
The main concept of this guide will be installing an E27 | Edison Screw Lampholder on top and an E14 | Small Edison Screw Lampholder inside.
All wired from a single supply and a connection inside the lamp to going the 3 wires together.
Below we begin, I will list the parts used in this guide below to easily identify the bits if you want to order.
- E27 Lampholder
- E14 Lampholder
- Hickey
- Nut Cover
- Standard Nut
- Washer
- Tube Grommet
- Chandelier Wire Brown (Option 1 see below)
- Chandelier Wire Blue (Option 1 see below)
- PVC Cable (Option 2 See below)
- Threaded Rod
- Heat shrink Sleeving
- Wagos
So now we have the parts used, let get going…
First off you will want to work out how much rod to use, remember you need approx 6mm sticking out the top (after installing nut and cover) this will allow enough thread for the lampholder to sit on.
Ensure there is enough room for the hickey + small rod + lampholder, you ideally want to ensure the hickey is inside the shaft of the lamp so the small Edison Screw lampholder is in the main compartment of the lamp base.
The reason you may want to try and house it all up in the shaft is so you don’t see it when the lamp is turned off.
Working out how much rod to use can be tricky but a bit of thinking and working out will ensure you get it right, this is hard to help with as different lamps require different lengths.
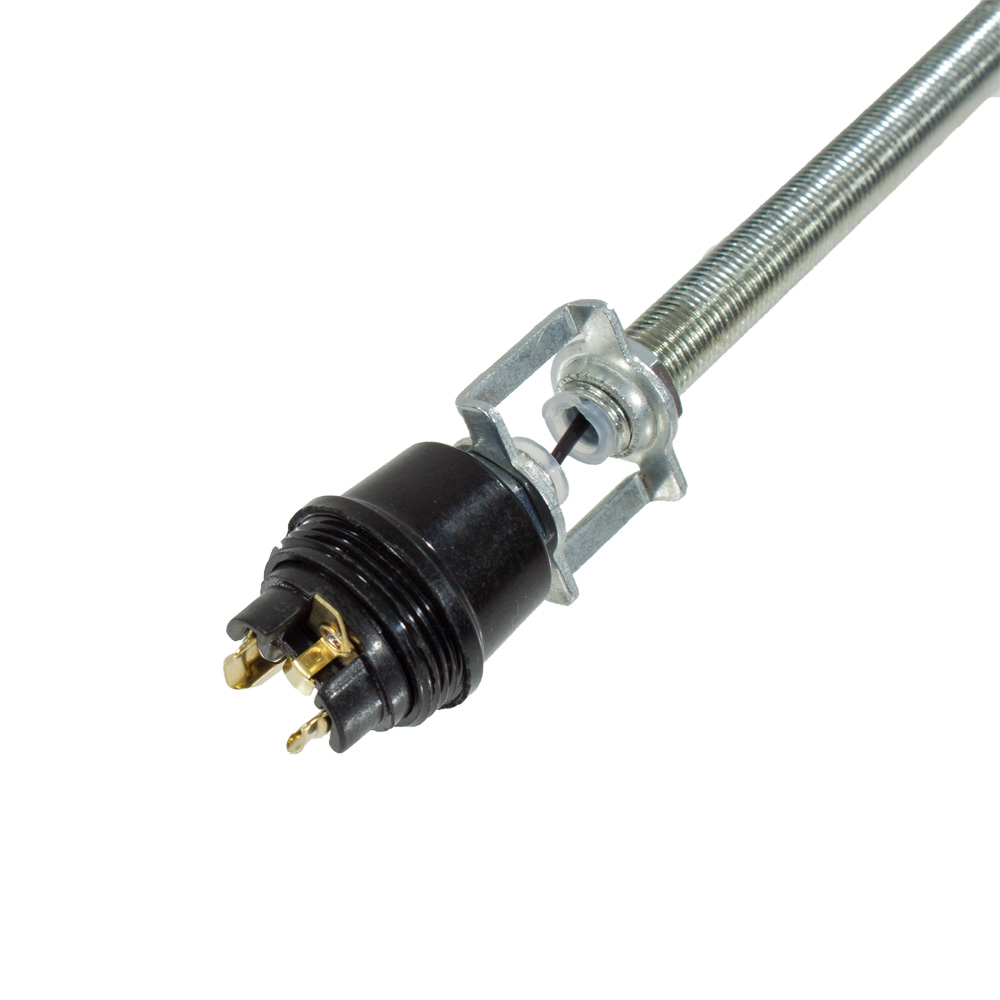
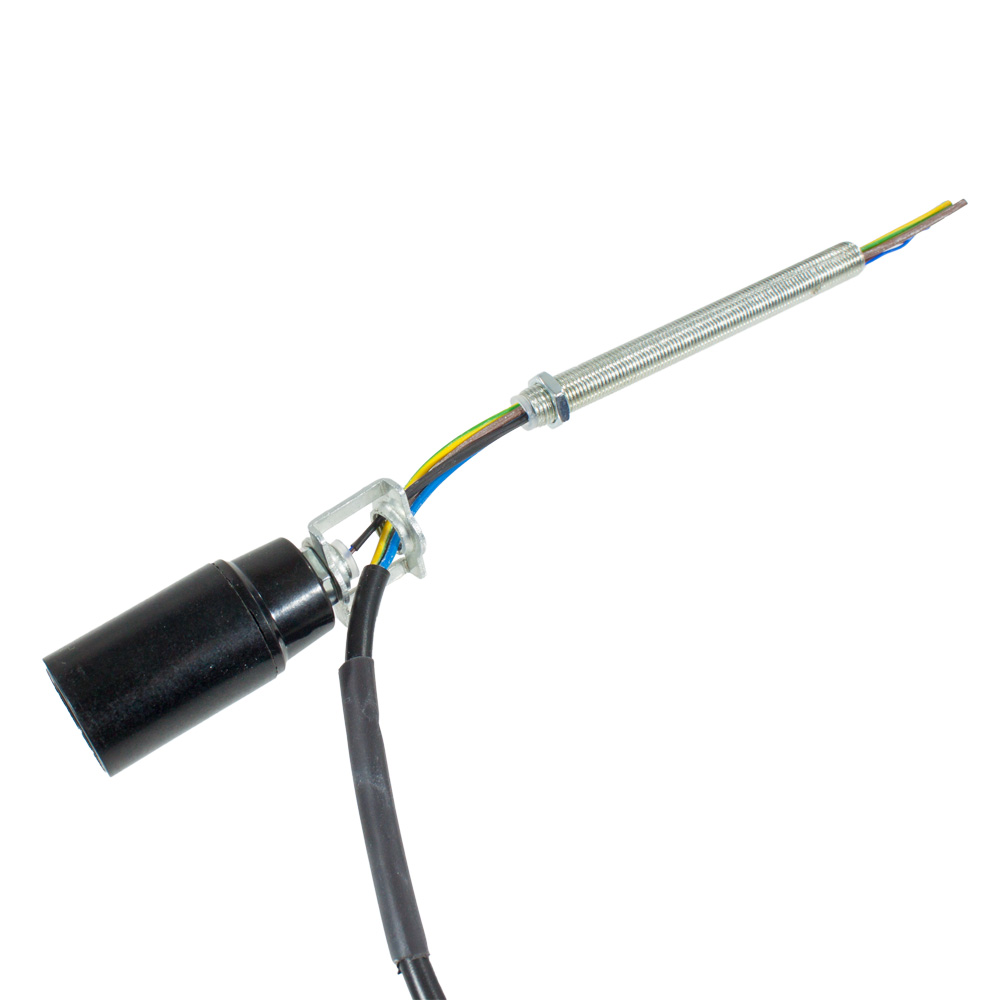
Once you have the length cut the rod to length, take a steel nut and screw it onto the end then place a tube grommet in the end of the rod and screw the hickey onto the rod.
Repeat the same process but using the small rod the other side of the hickey, as shown below.

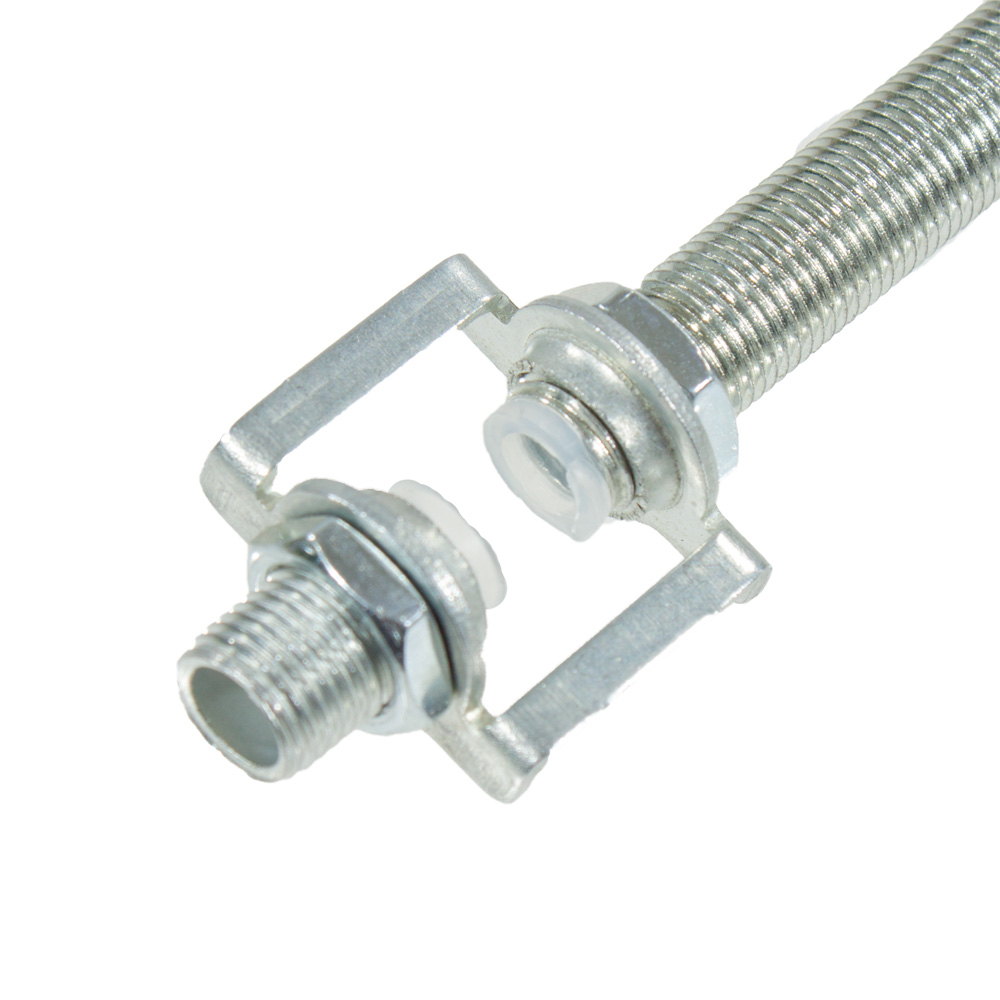
Note: It may be worth using some superglue after you have confirmed all the lengths are correct, this will ensure that nothing will move over time.
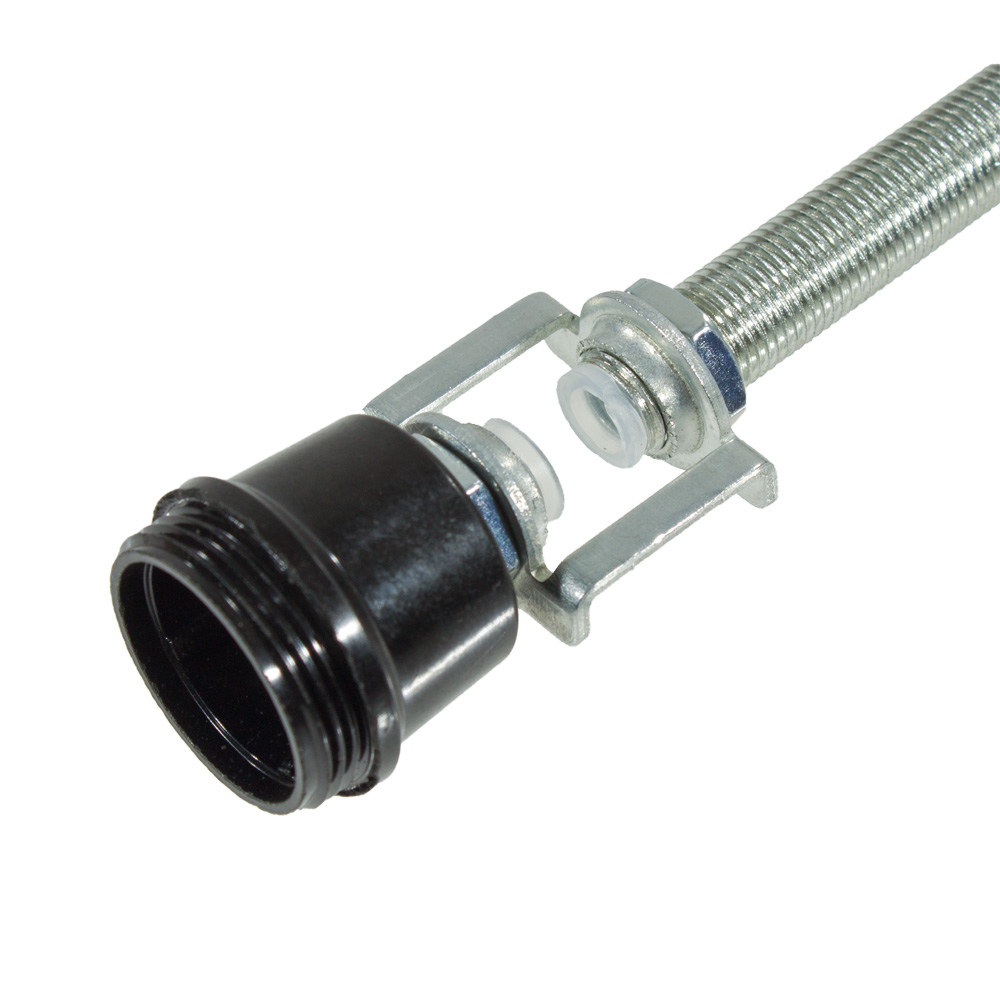
Take the bottom section of the E14 lampholder and screw it onto the smaller piece of threaded rod.
The next thing to do is to thread a steel nut onto the rod followed by a washer as shown below.
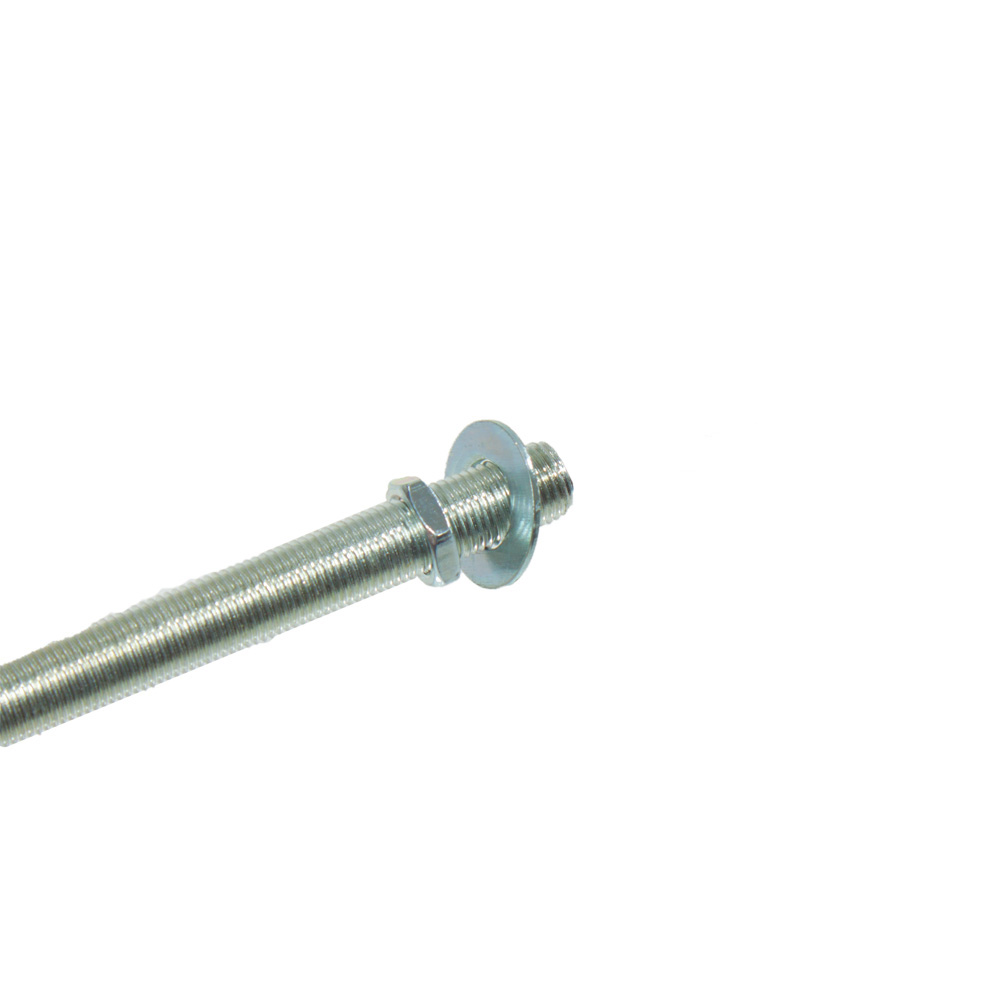
Knowing how far to put the nut down the rod can be a trial and error process, the best way would be to measure the distance from the nut to the top of the rod, deducting the thickness of the washer inside, the lamp base and the nut + washer on the top.
Then ensuring you have 6mm sticking out the top, for me this is too much and i prefer to just guess and try.
If there is not enough thread sticking out the top i remove it spin the nut down a bit and try again.
Likewise, if too much is sticking out the top you can either cut the rod off or simply remove the assembly and spin the nut up the rod.
Once you have the correct length set put a mark on the rod where the nut is this is because if the nut moves when wiring the assembly you will have to do the above process again.
Next is wiring the assembly there are 2 options and i will cover both here –
Jump to option 1 – In depth and tricky but will look way better if you are planning on re selling or if you cannot hide the connections inside the lamp.
Jump to option 2 – Faster and easier however not as cosmetically clean, however if you can hide all the wiring and connections then this is the best option to take.
Option 1:
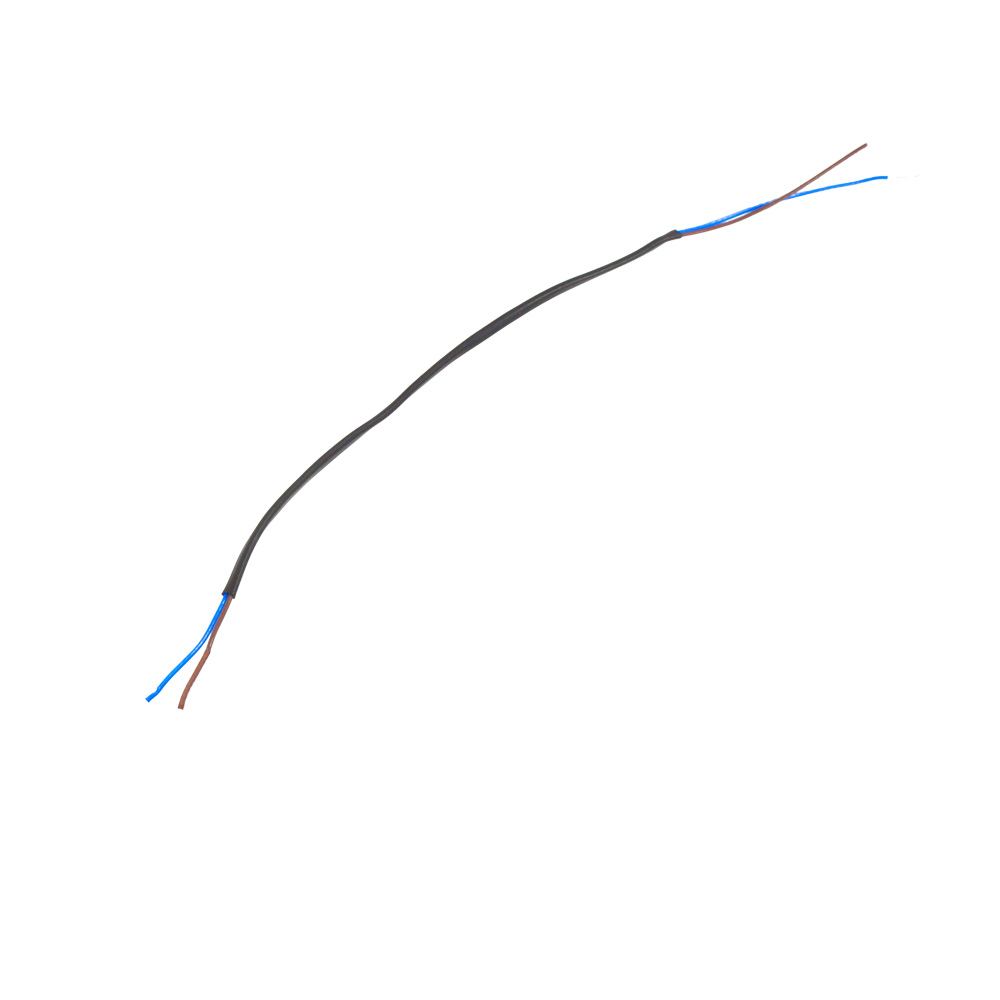
Take the 2 small chandelier wires and measure from the E14 to the E27 lampholders as these wires will be going from the E14 to the E27 lampholder’s.
Ensure to over cut a bit it is always better to have more than less when it comes to cabling!
Once you have the length take the heat shrink sleeving and cut it so all of the heat shrink will be inside the rod and just sticking out either end, this will do 2 things, 1 to give it extra protection, 2 looks neat.
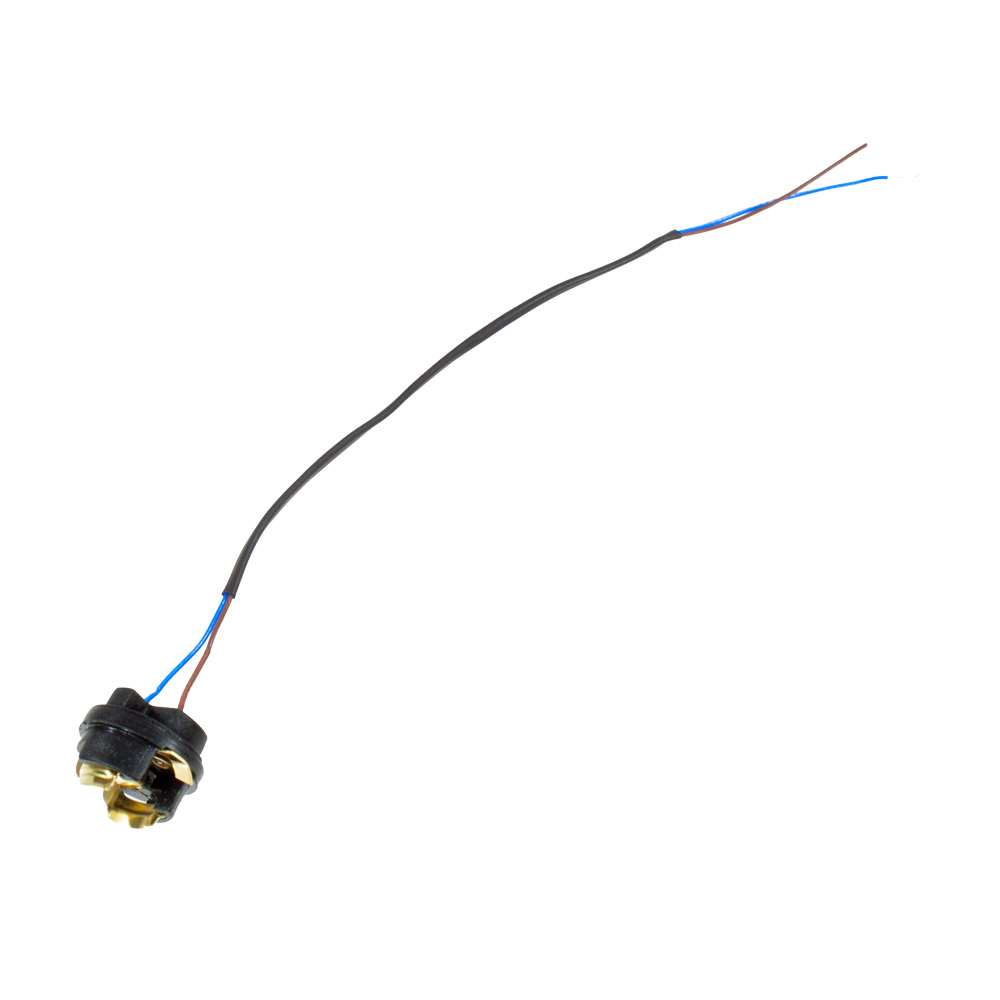
Take the E14 insert and wire it onto the wiring loom, further information about wiring the lampholder can be found here: Installing Arditi Brand E14 lampholder’s
Once the E14 lampholder has been wired, next we need to look at getting the main supply cable into the assembly and sticking out the top.
Due to the lack of room inside the threaded rod, I had to strip the outer PVC jacket from the cable.
Note that I cut a slightly larger piece of heat shrink sleeving and slid it onto the cable.
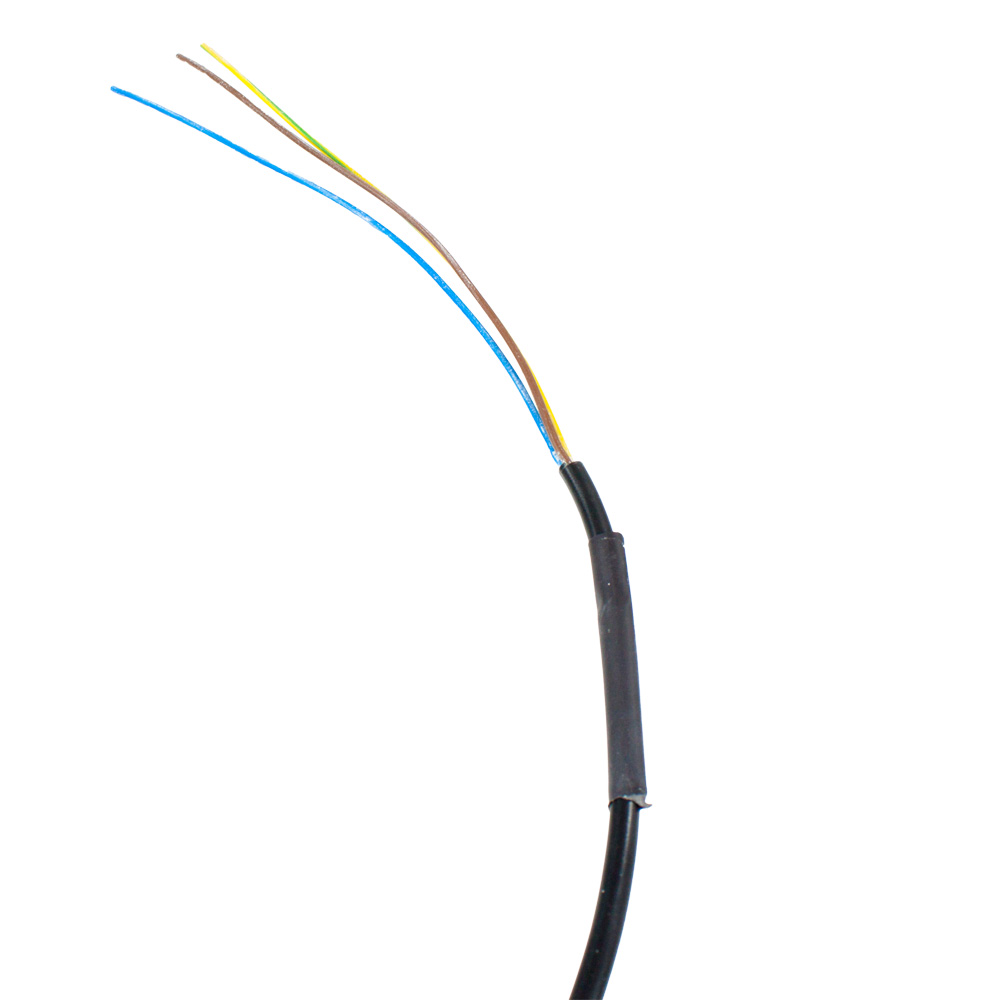
I removed the larger all threaded rod to help with installation of the cable.
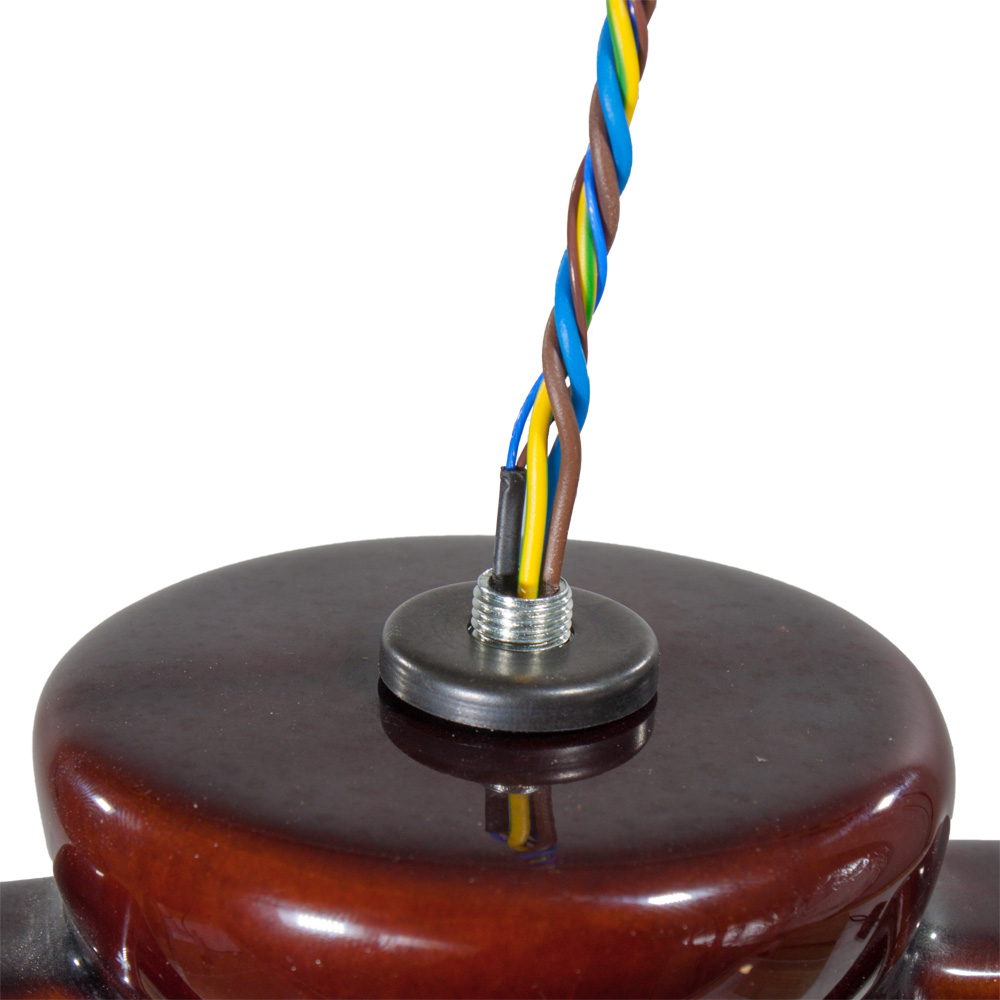
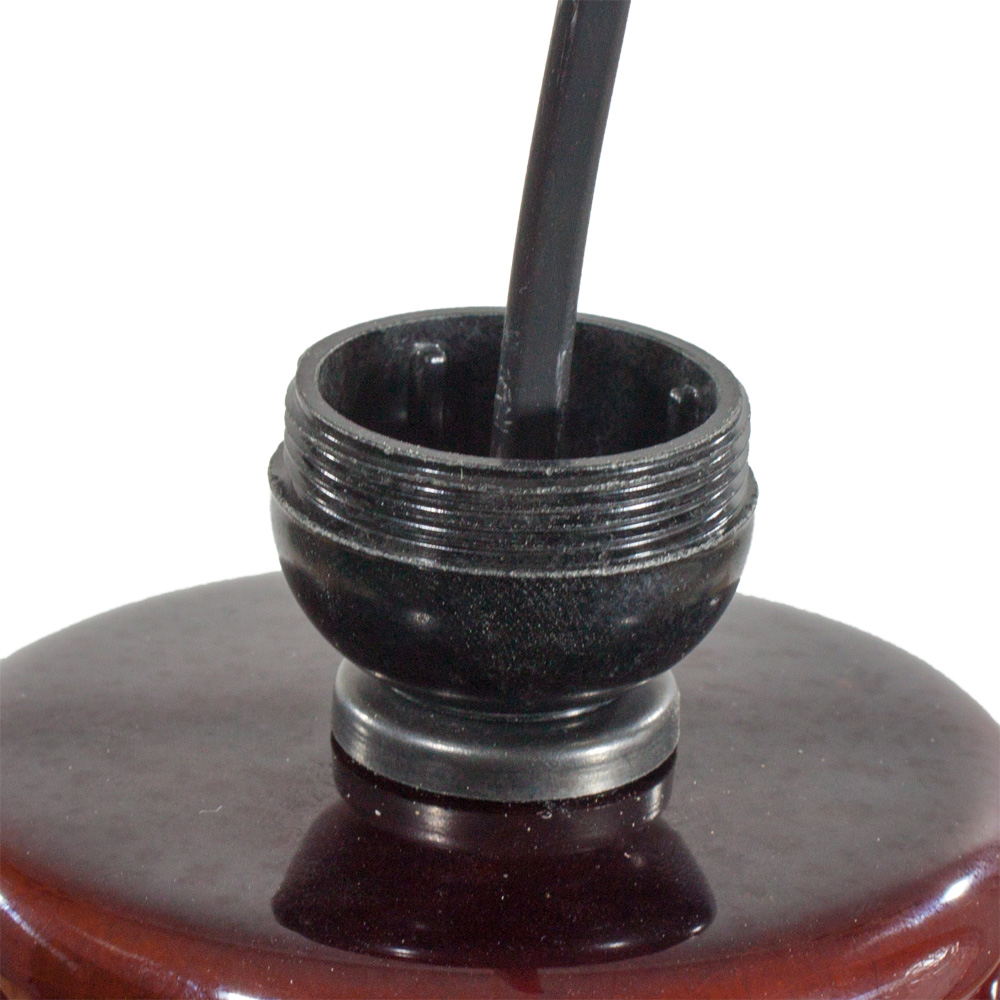
Once the supply cable has been pushed through the rod and sticking out the top of the alongside the chandelier wire assembly, then it is time to install the whole assembly into the lamp base.
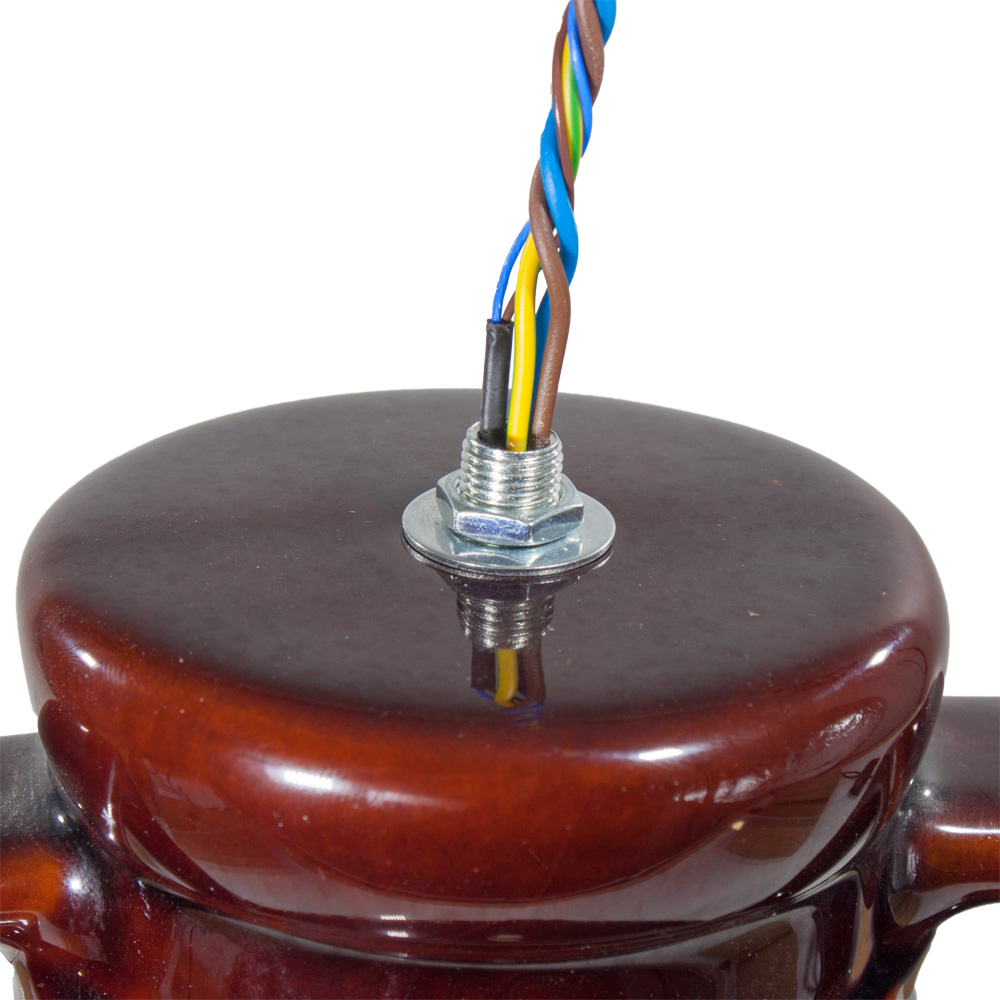
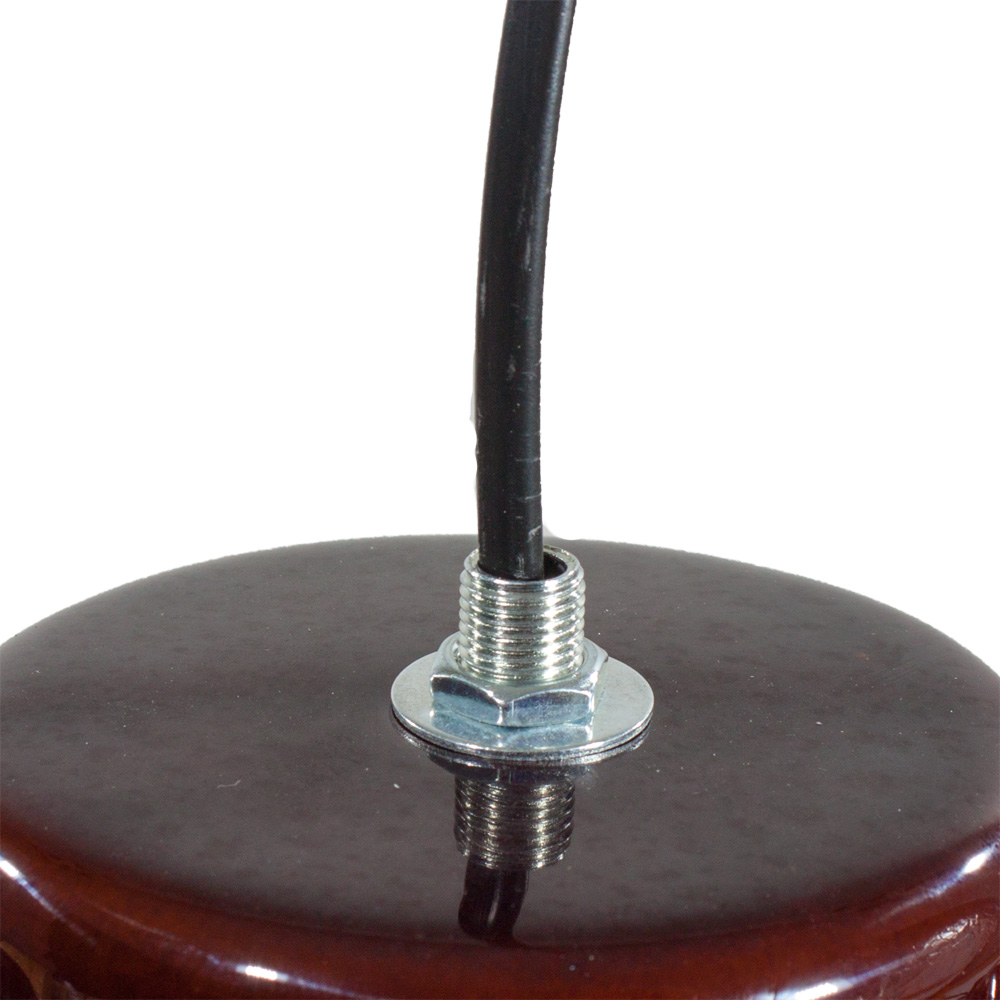
Take another washer and nut and install that on the piece of thread sticking out the top.
Now carefully tighten the top nut up, you may want to use glue as well as you don’t want to over tighten the nut as well as maybe a rubber/plastic washer if required.
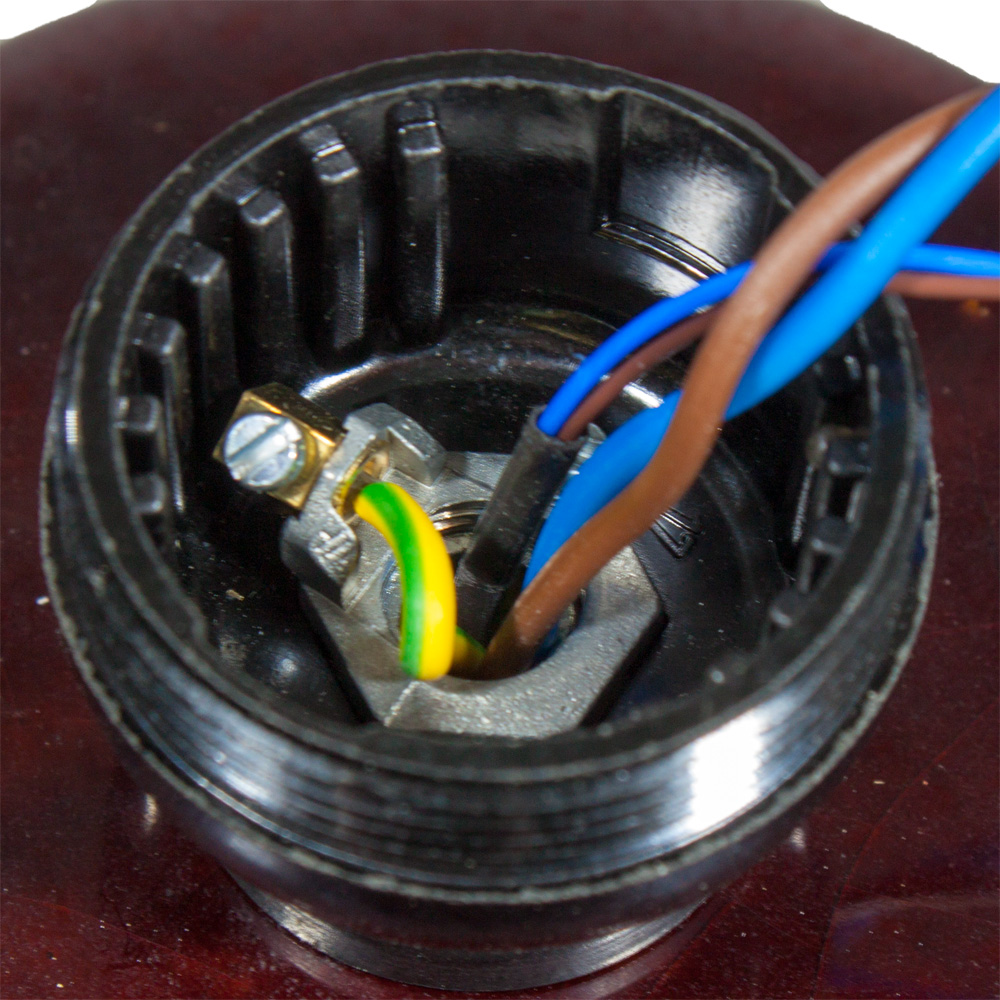
Please see the following link for full installation guidance on wiring the lampholder: Installing Arditi Brand E27 lampholder’s
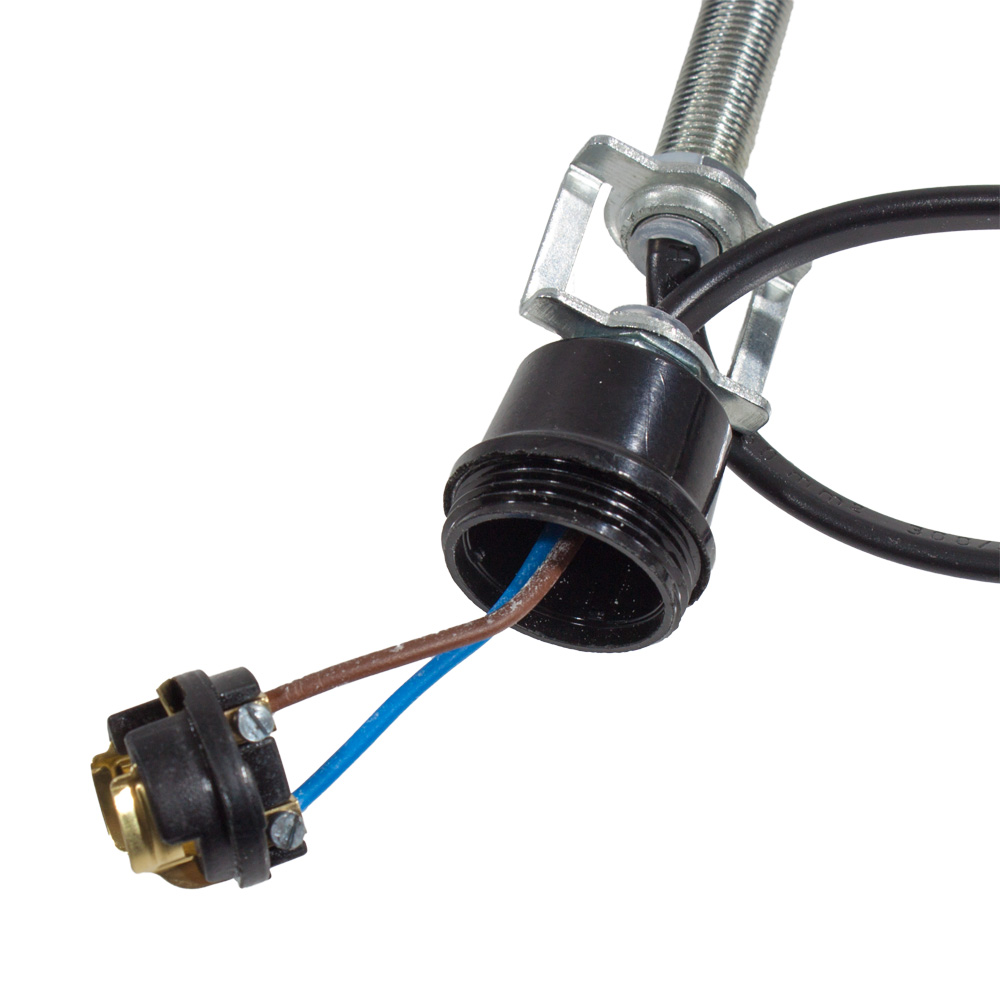
Note: The above guide is for a 2 core cable, the connection wiring is the same but the earth will go into the cap as show below.
As the guide will only show a single cable you will need to ensure you either solder the chandelier wire to the supply wire or use ferrules.
Once the lampholder has been wired completely please jump to the Cord grip section to finish off the whole installation.
Option 2:
For this option i used 2 core flat cable as it fits into the thread rod well, no need for a earthed solution as long as the inner cores (blue, brown) are NOT inside the threaded rod.
You will need 3 pieces of wire for this 1 small piece for the E14 lampholder, 1 longer piece for the E27 lampholder and the main length for the supply.
All 3 will need to be joined inside the lamp base.
Take all 3 pieces and strip the ends so they are all the same, then using Wagos connect all the browns together and all the blues together.


As above you should already have the hickey installation on the threaded rods.
Take the E14 insert and wire it onto the wiring loom, further information about wiring the lampholder can be found here: Installing Arditi Brand E14 lampholder’s
Once the E14 lampholder is wired and complete take the assembly and feed it through the lamp base.
As you have already placed the nut in the correct position you should have the right amount of thread sticking out the top.
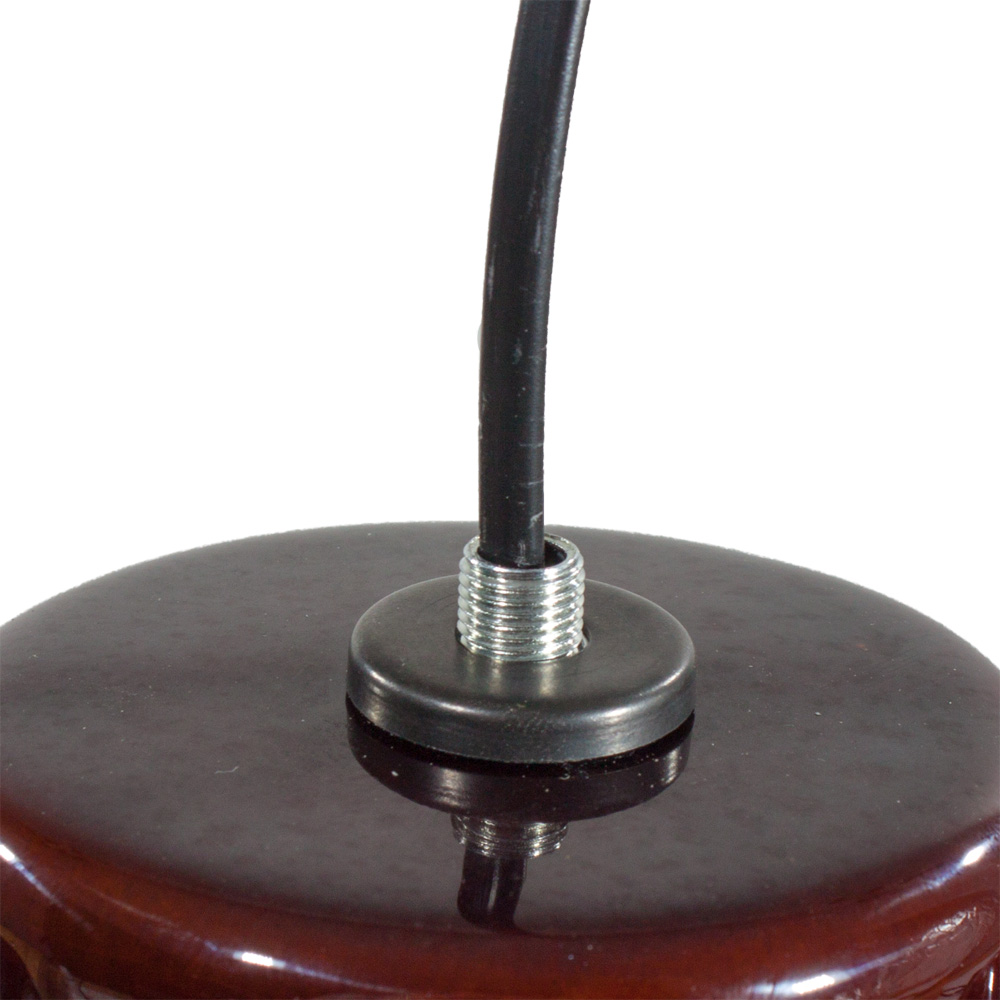
Take another washer and slide it over the thread followed by a nut.
Now carefully tighten the top nut up, you may want to use glue as well as you don’t want to over tighten the nut as well as maybe a rubber/plastic washer if required.
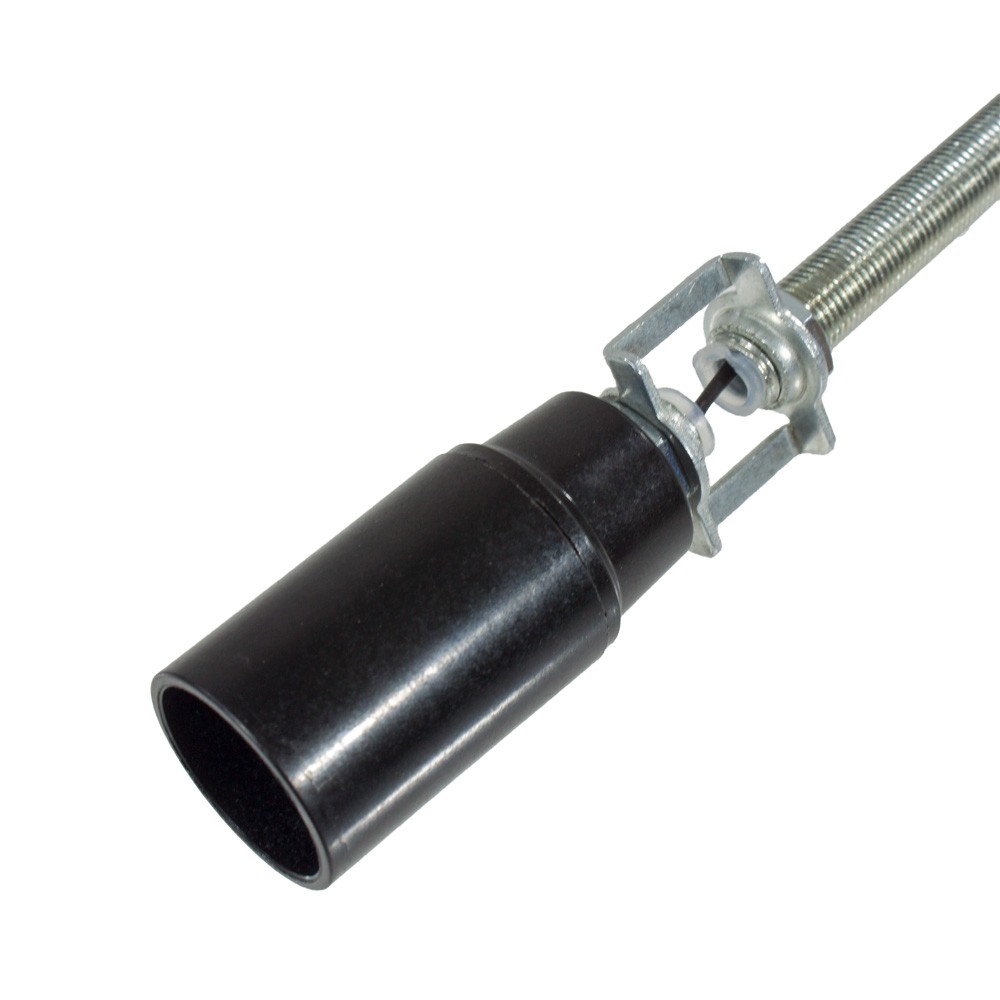
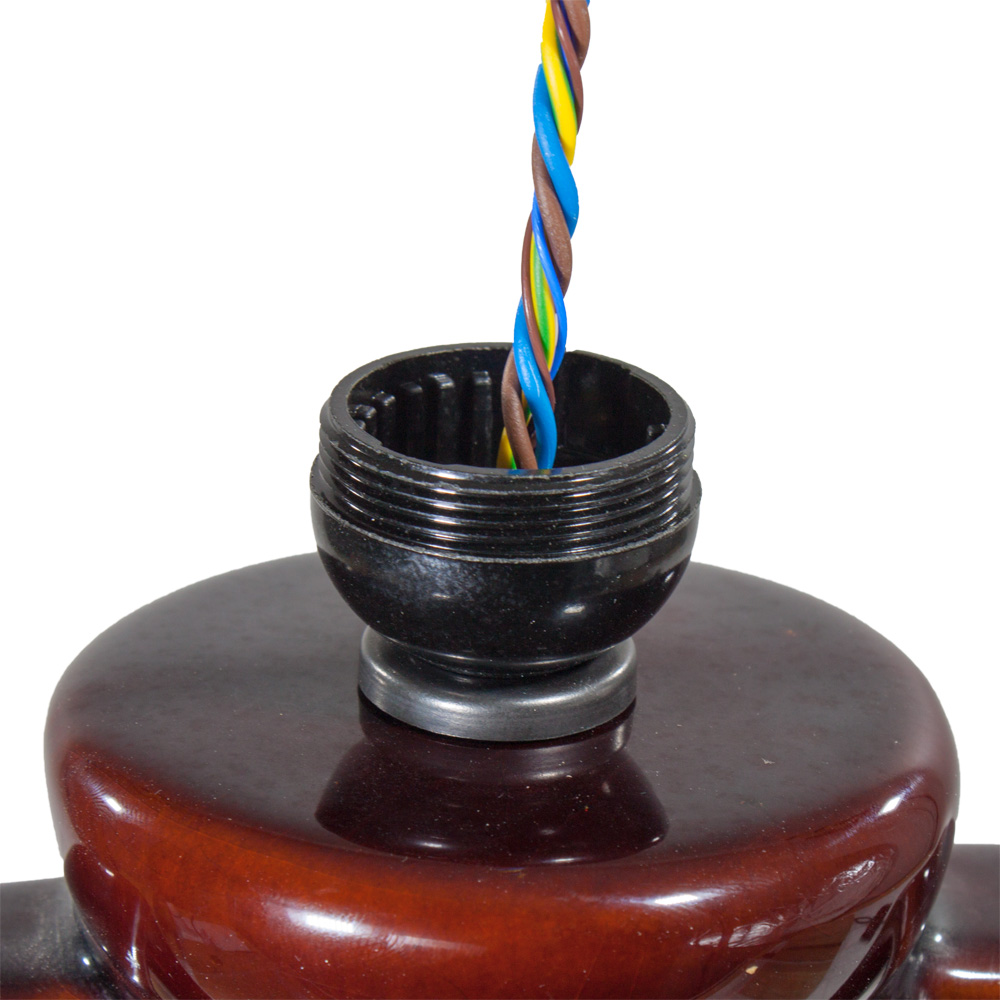
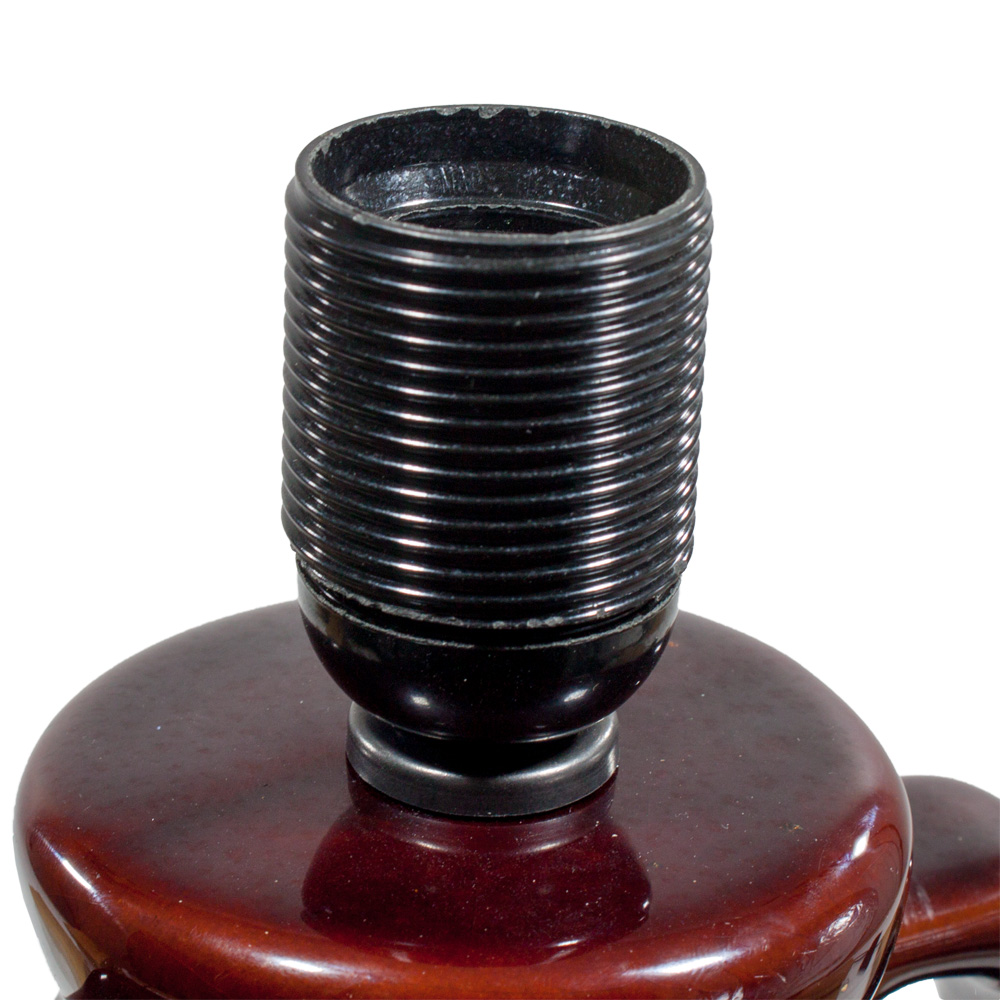
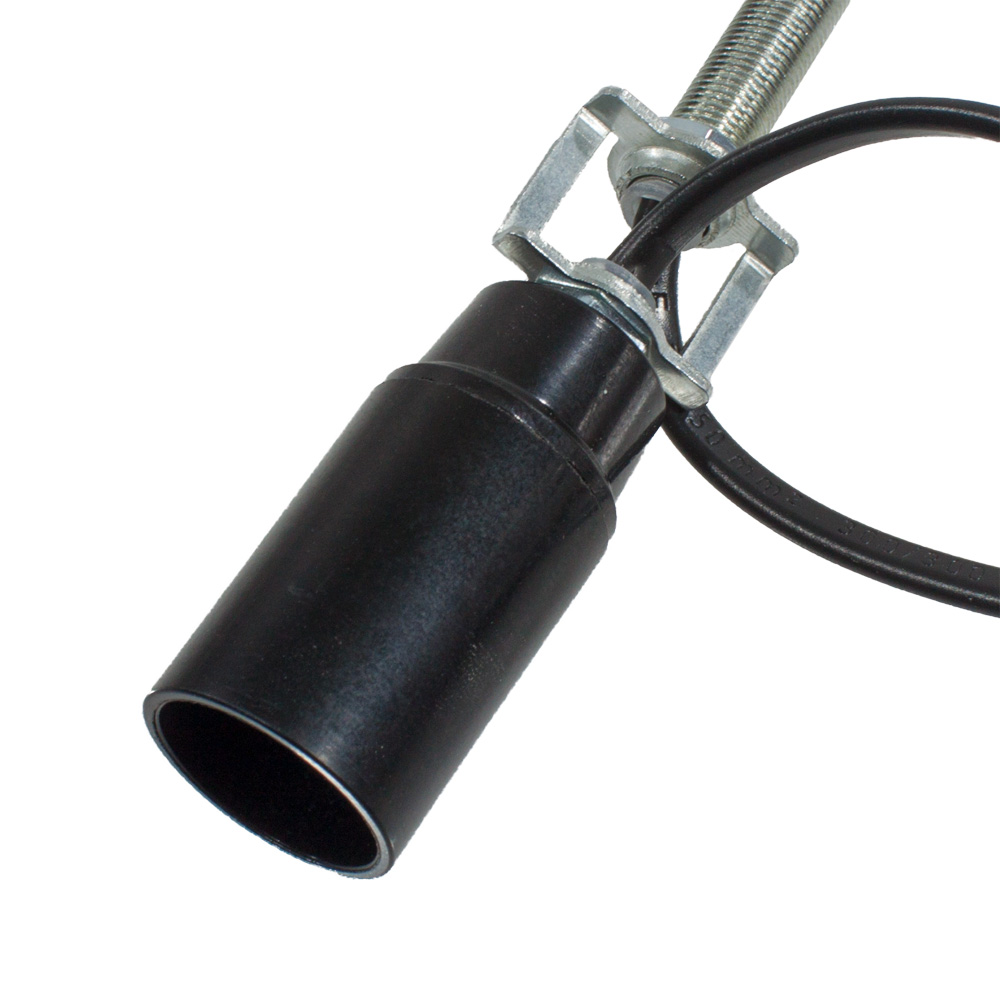
Once you have the whole assembly in place where you want it you can then place the nut cover over the top and screw on the bottom section of the lampholder.
Please see the following link for full installation guidance on wiring the lampholder: Installing Arditi Brand E27 lampholder’s

Cord Grip
After the wiring has been completed you will need to install a cord grip (strain relief) onto the cable.
This is crucial as this will prevent the cable from being pulled out of the lampholders or wago’s.
There are many ways of doing this but below is the best way for a standard hole in the side of the lamp base.
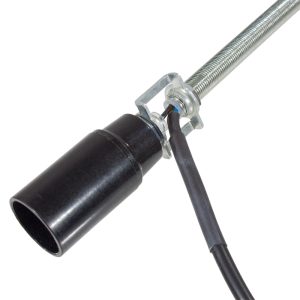
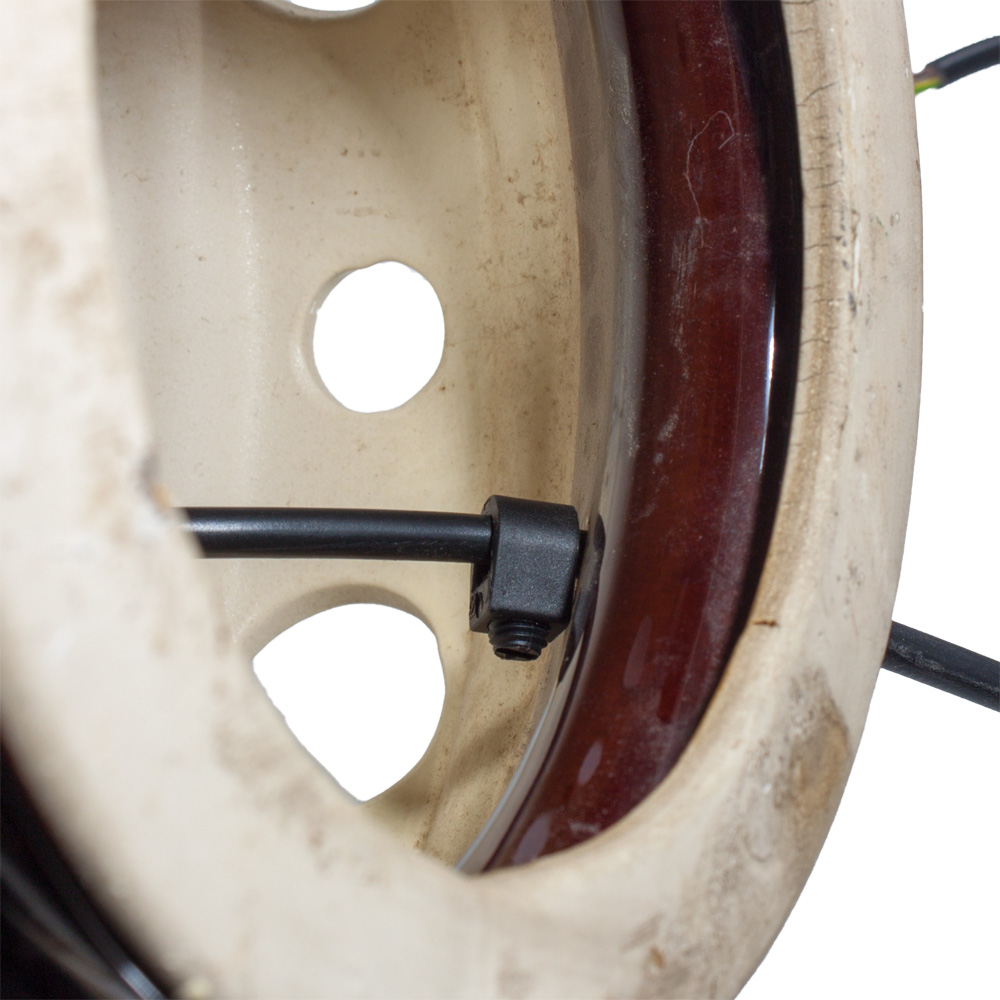
We use a cord grip called a CE4 that will slide onto the before pushing the cable out of the lamp base.
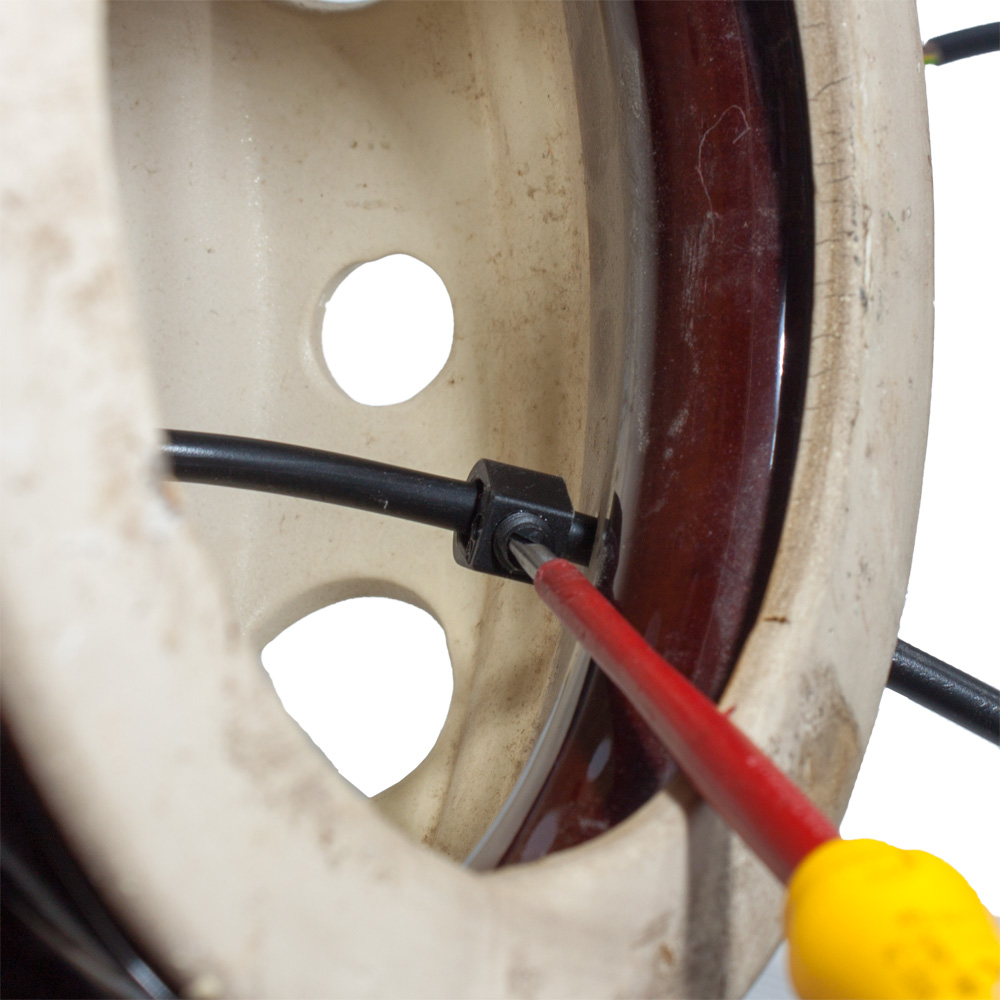
These are the easiest ones to use as you can leave the grip loosen on the cable until the very end where you can then simply use a slotted screwdriver to tighten it onto the cable.
This will be done right behind the cable hole as shown below.
Once this has been done it’s a simple matter of installing a switch/dimmer and a plug top.
0 out of 5 stars
| 5 Stars | 0% | |
| 4 Stars | 0% | |
| 3 Stars | 0% | |
| 2 Stars | 0% | |
| 1 Stars | 0% |