Welcome to our Support Portal. Search for answers using the search box below, or create a support ticket if you cannot find your answer.
-
Repairing a Lamp?
-
Product Info
-
-
- Installing Arditi Brand Metal E27 Lampholder's
- How to unlock my ES & SES Lampholder
- Installing Arditi Brand Plastic E27 lampholder's
- How to install our push fit E27 and E14 lampholders
- Wiring an E27 Pull cord Lampholder
- Wiring an E27 Switched Lampholder
- Installing S.Lilley Brand Metal E27 Lampholders
- How to Install our Lampholder Cup and Cord Grip
- Lampholder Bases explained
-
- Wiring A BC Un-Switched Lampholder
- Wiring An S.Lilley BC Switched Lampholder
- Wiring a Plastic BC Lampholder
- Installing the 40mm BC 4 Part Lampholder
- Wiring the BC Push Wire Plastic Snap on Cap Lampholder
- Safer switched lampholder not working
- Aligning a BC Unswitched Lampholder
- Lampholder Bases explained
-
-
- Kit 33 Installation Guide
- Kit 17 Installation Guide - ES Version
- Kit 32 Installation Guide
- Kit 21 Installation Guide
- Ceramic Side Entry Wiring Kit with a ES | E27 | Edison Screw Lampholder
- Ceramic Side Entry Wiring Kit with Unswitched BC | B22 Lampholder
- Kit 18 Installation Guide
- Kit 15 Installation Guide
- Kit 35 Installation Guide
- Plastic Wooden Table Lamp Fixing Kit With Backplate and Cover - BC Version
- Plastic Wooden Table Lamp Fixing Kit With Wood Nipple – BC Version
- Kit 12 Installation Guide
- Kit 11 Installation Guide
- Kit 8 Installation Guide
- Kit 1 Installation Guide
- Kit 21 Components
- Show Remaining Articles ( 1 ) Collapse Articles
-
-
Creating a Lamp?
-
- How to fix or install a lampholder onto a ceramic item with limited hand access.
- How to turn a bottle into a light fitting
- Measuring Bottle Hole For Bung Size
- Converting a Hong Kong Paraffin Lamp into a Table lamp
- Installing our ceiling roses
- How to Convert a Gas Blow Torch Into a Light Fitting
- How to repair a light that has a lamp inside and outside
-
-
Videos
How to install our push fit E27 and E14 lampholders
4.7 out of 5 stars
13 ratings
| 5 Stars | 46% | |
| 4 Stars | 54% | |
| 3 Stars | 0% | |
| 2 Stars | 0% | |
| 1 Stars | 0% |
This guide is to show you how to install our push fit lampholders in the E27 and E14 ranges.
Before you start you need to ensure that the stripped ends of your cables are solid.
This can be done by using ferrules or to solder the ends, this ensures that when you push the cables into the lampholder they will not bend or move around.
If you have a solid cable then the barb on the inside will grip it ensuring a safe and solid connection between the cable and lampholder.
The following components were used in this guide:
2 Step 2
3 Step 3
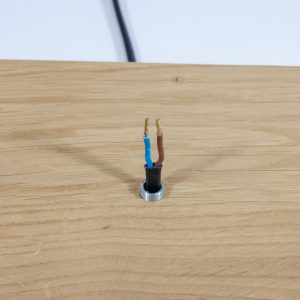
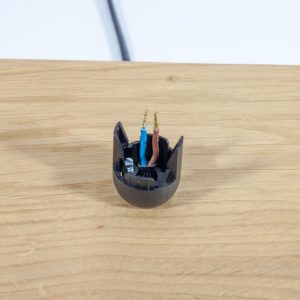
Take the main body of the lampholder and push the wires into the holes on the rear of the lampholder, as shown in the image below.
Please note that the Live (Brown) and Neutral (Blue) go in opposite ends from each other.
There are 2 holes next to each other it does not matter what hole you use, just means you could have 2x Blue and 2x Brown cables, however we do not recommend this as a standard installation.
The cables will push in, and you will hear/feel a slight click, give the cable a gentle pull back to ensure it's secured into the lampholder.
If you need to remove the cable jump to step 5
Ensure the brown (live) is pushed into the centre pinhole, to find this out please see the following video.
1 Step 4
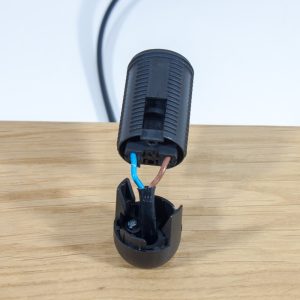
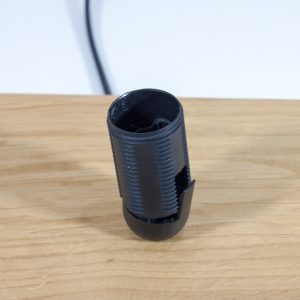
After inserting and fixing the cables you can now click the top section into the base section.
This will only go around one way it should make sense what way this goes.
Ensuring the cables are tucked out the way as you dont want to catch them when pushing 2 parts together.
Tip: If for some reason you cannot click the top section into the base section ensure the small grub screw in the base section is fully tightened down.
This now finishes the installation of the lampholder.
Below you will find the steps required to undo the lampholder if you have found an issue.
Need to undo the lampholder?
1 Step 1
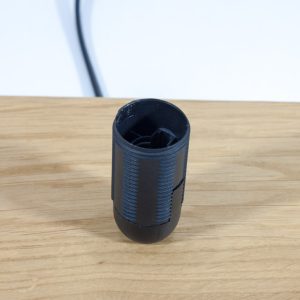
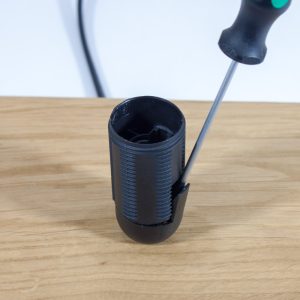
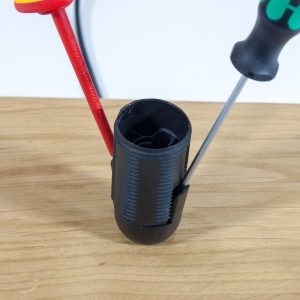
If you need to separate the lampholder then you will need 2x screwdrivers or something similar.
You will need to insert one screwdriver into the slot as seen below holding that into position then insert the 2nd screwdriver pushing both screwdrivers together then lifting the top part of lampholder will separate them.
Please be careful not to be too rough as you can snap the 2x clips.
1 Step 2
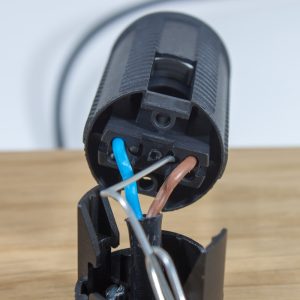
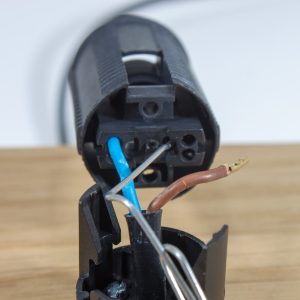
After removing the top section you can also remove the cables if needed, this can be a little tricky and will require a paperclip or something similar.
The idea is that you will need to insert the paperclip in as you are gently pulling on the cable, wiggle the paperclip around and the can should simply pop out.
On some occasions you can pull the ferrule off the end of the cable, this isn't an issue as such as all you need to do is re install a new ferrule and insert cable into spares hole.
4.7 out of 5 stars
13 ratings
| 5 Stars | 46% | |
| 4 Stars | 54% | |
| 3 Stars | 0% | |
| 2 Stars | 0% | |
| 1 Stars | 0% |
