Welcome to our Support Portal. Search for answers using the search box below, or create a support ticket if you cannot find your answer.
-
Repairing a Lamp?
-
Product Info
-
-
- Installing Arditi Brand Metal E27 Lampholder's
- How to unlock my ES & SES Lampholder
- Installing Arditi Brand Plastic E27 lampholder's
- How to install our push fit E27 and E14 lampholders
- Wiring an E27 Pull cord Lampholder
- Wiring an E27 Switched Lampholder
- Installing S.Lilley Brand Metal E27 Lampholders
- How to Install our Lampholder Cup and Cord Grip
- Lampholder Bases explained
-
- Wiring A BC Un-Switched Lampholder
- Wiring An S.Lilley BC Switched Lampholder
- Wiring a Plastic BC Lampholder
- Installing the 40mm BC 4 Part Lampholder
- Wiring the BC Push Wire Plastic Snap on Cap Lampholder
- Safer switched lampholder not working
- Aligning a BC Unswitched Lampholder
- Lampholder Bases explained
-
-
- Kit 33 Installation Guide
- Kit 17 Installation Guide - ES Version
- Kit 32 Installation Guide
- Kit 21 Installation Guide
- Ceramic Side Entry Wiring Kit with a ES | E27 | Edison Screw Lampholder
- Ceramic Side Entry Wiring Kit with Unswitched BC | B22 Lampholder
- Kit 18 Installation Guide
- Kit 15 Installation Guide
- Kit 35 Installation Guide
- Plastic Wooden Table Lamp Fixing Kit With Backplate and Cover - BC Version
- Plastic Wooden Table Lamp Fixing Kit With Wood Nipple – BC Version
- Kit 12 Installation Guide
- Kit 11 Installation Guide
- Kit 8 Installation Guide
- Kit 1 Installation Guide
- Kit 21 Components
- Show Remaining Articles ( 1 ) Collapse Articles
-
-
Creating a Lamp?
-
- How to fix or install a lampholder onto a ceramic item with limited hand access.
- How to turn a bottle into a light fitting
- Measuring Bottle Hole For Bung Size
- Converting a Hong Kong Paraffin Lamp into a Table lamp
- Installing our ceiling roses
- How to Convert a Gas Blow Torch Into a Light Fitting
- How to repair a light that has a lamp inside and outside
-
-
Videos
Converting a Hong Kong Paraffin Lamp into a Table lamp
0 out of 5 stars
| 5 Stars | 0% | |
| 4 Stars | 0% | |
| 3 Stars | 0% | |
| 2 Stars | 0% | |
| 1 Stars | 0% |
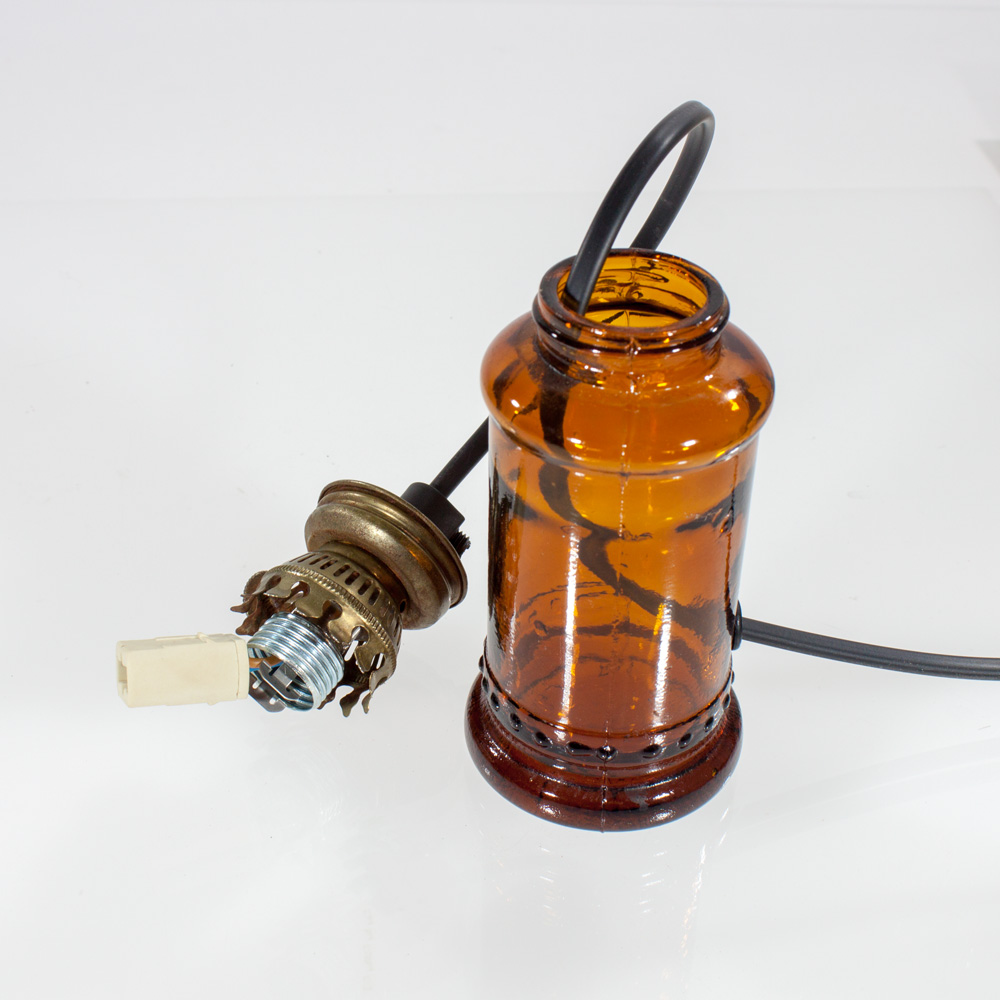
This guide will show you how to turn a glass paraffin style lamp into a light fitting.
Your lamp may not look the same, but may have the same types of features as shown in this guide and may help you.
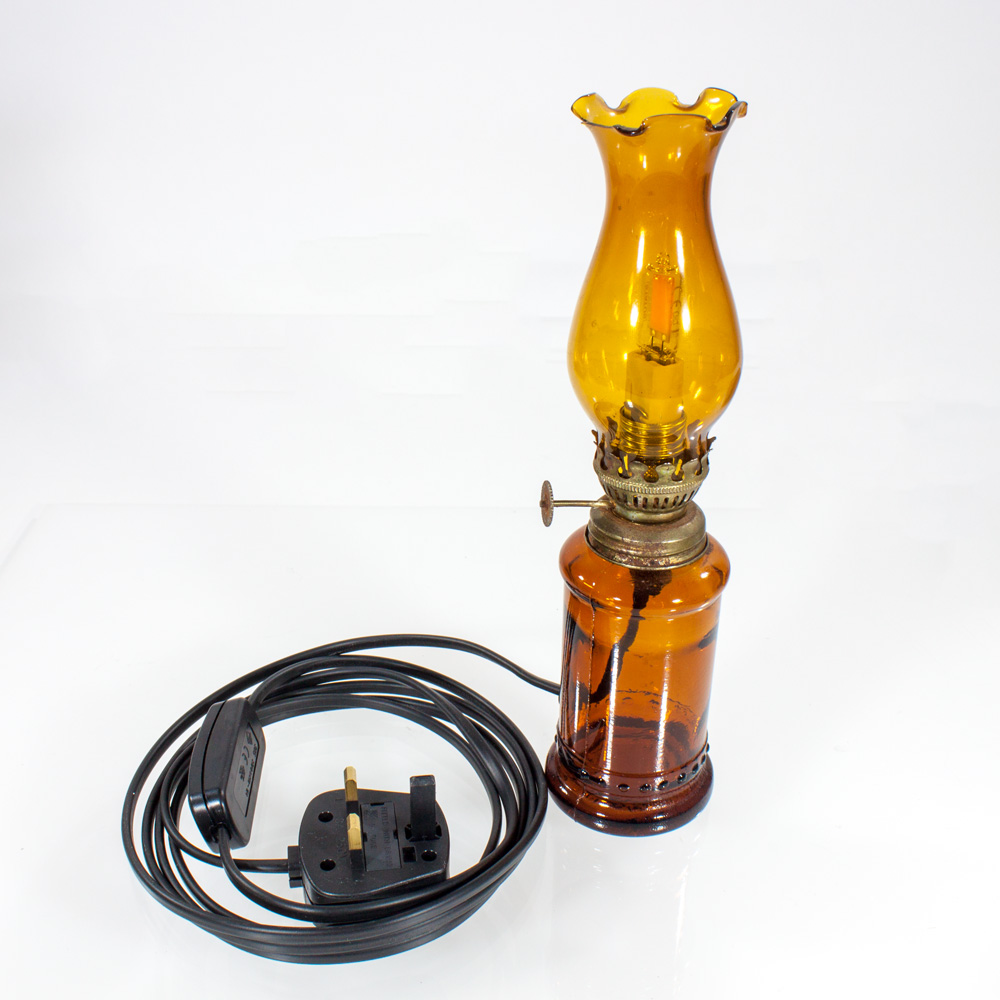
The concept around this lamp is the cable begin drilled through the glass bottle and up into a G9 Halogen lampholder using an LED lamp.
Parts used in this guide:
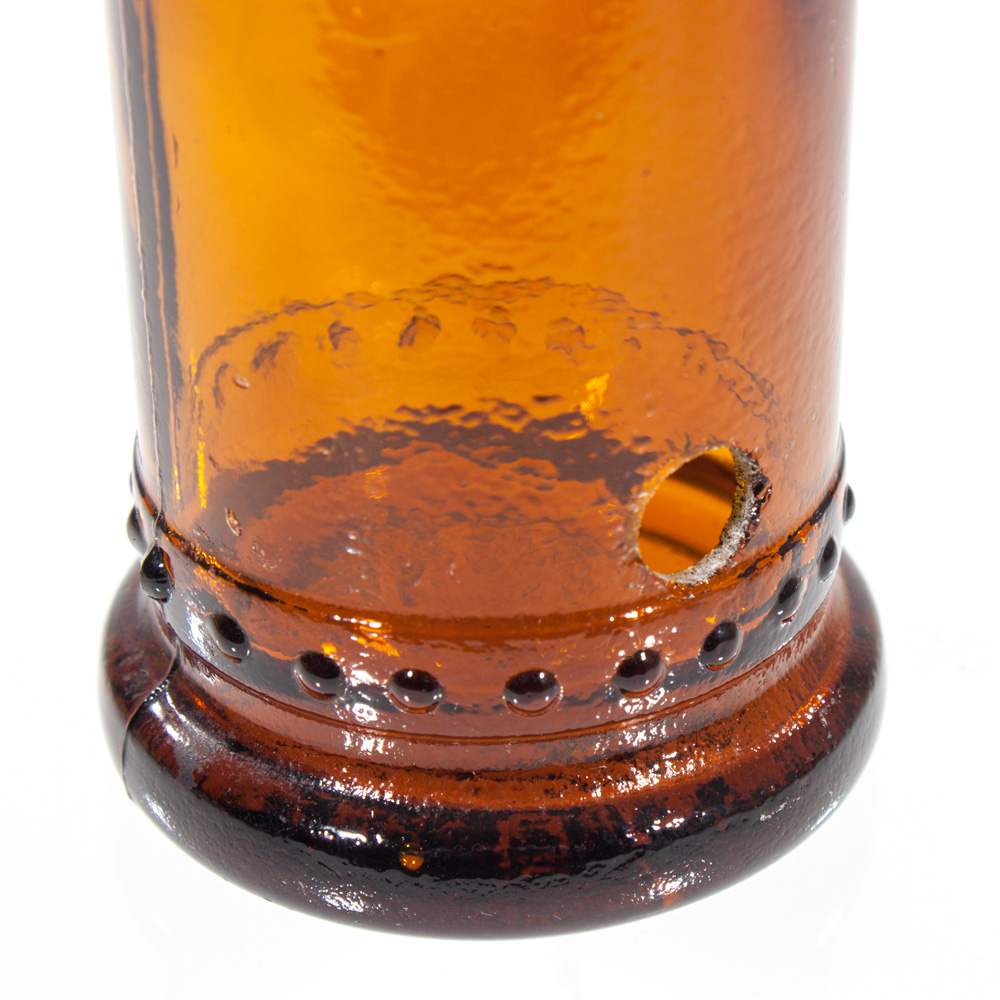
The first step is to drill a hole into the glass we have a video on how I drill glass bottles.
Once the hole has been made in the bottle you will need to put cable protection in the hole to prevent the cable from potentially cutting on what could be a sharp hole.
This is where we use one our black grommets.
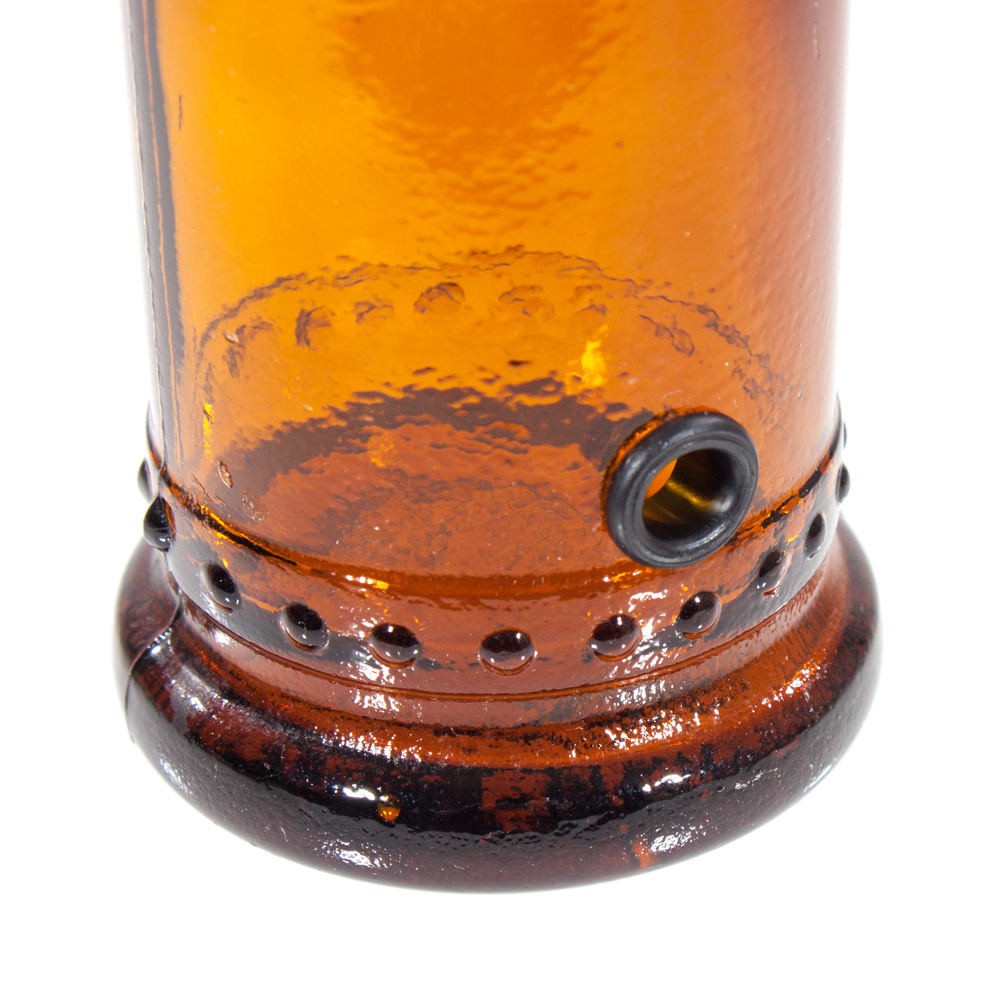
Once this has been achieved, we can put the glass bottle to one side for a second.
I then had to work out how to attach a lampholder and what lampholder to attach to the fittings i have.
This is always something that needs a bit of thinking as there are many ways to achieve this.
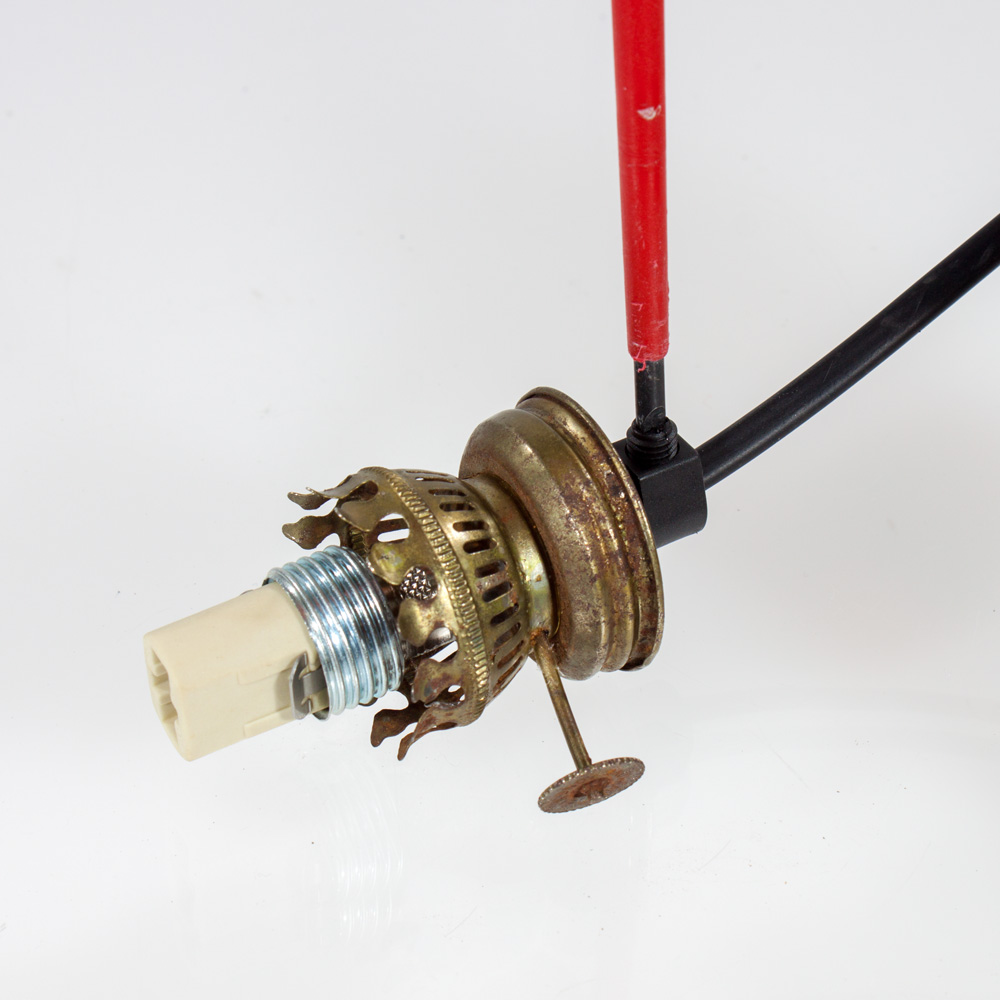
I was lucky with this item as i had a hole already in the center of the metal disc, all i had to do was make it 10mm nice and simple with a drill.
I then decided to use a threaded rod with a nut and washer.
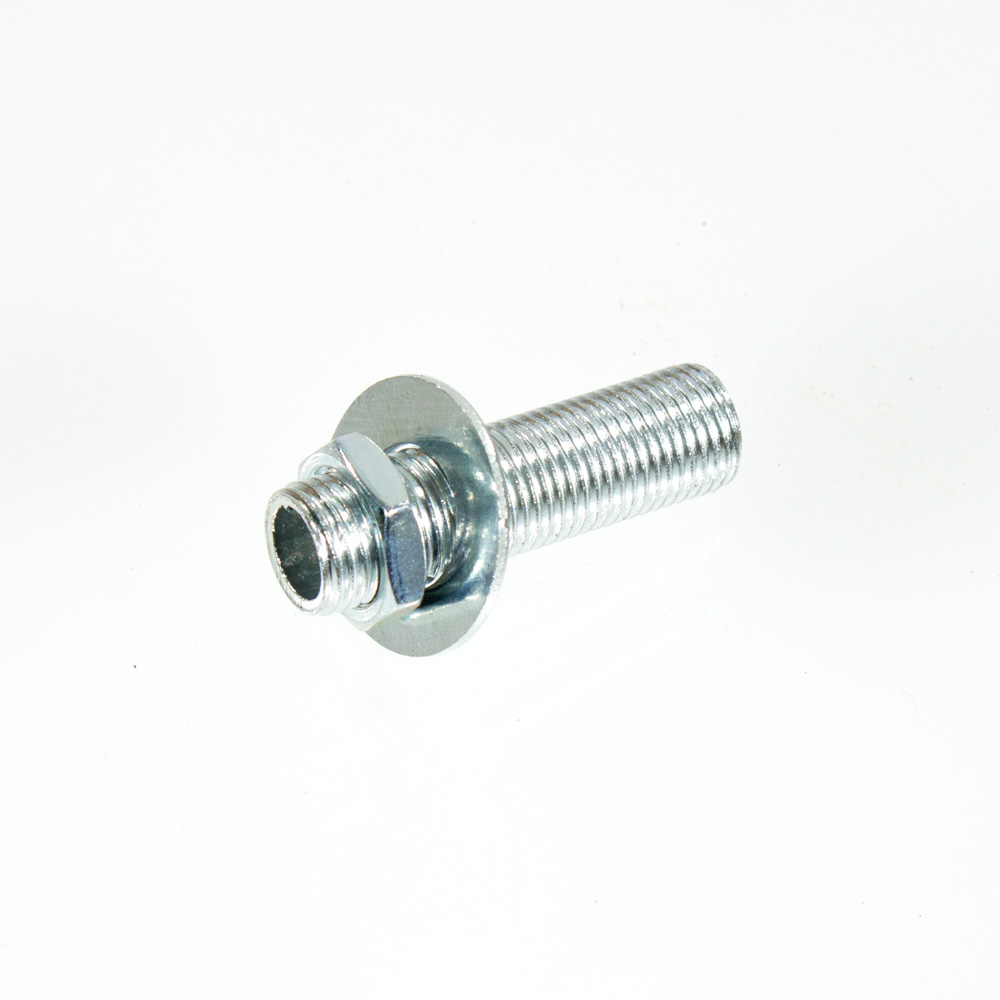
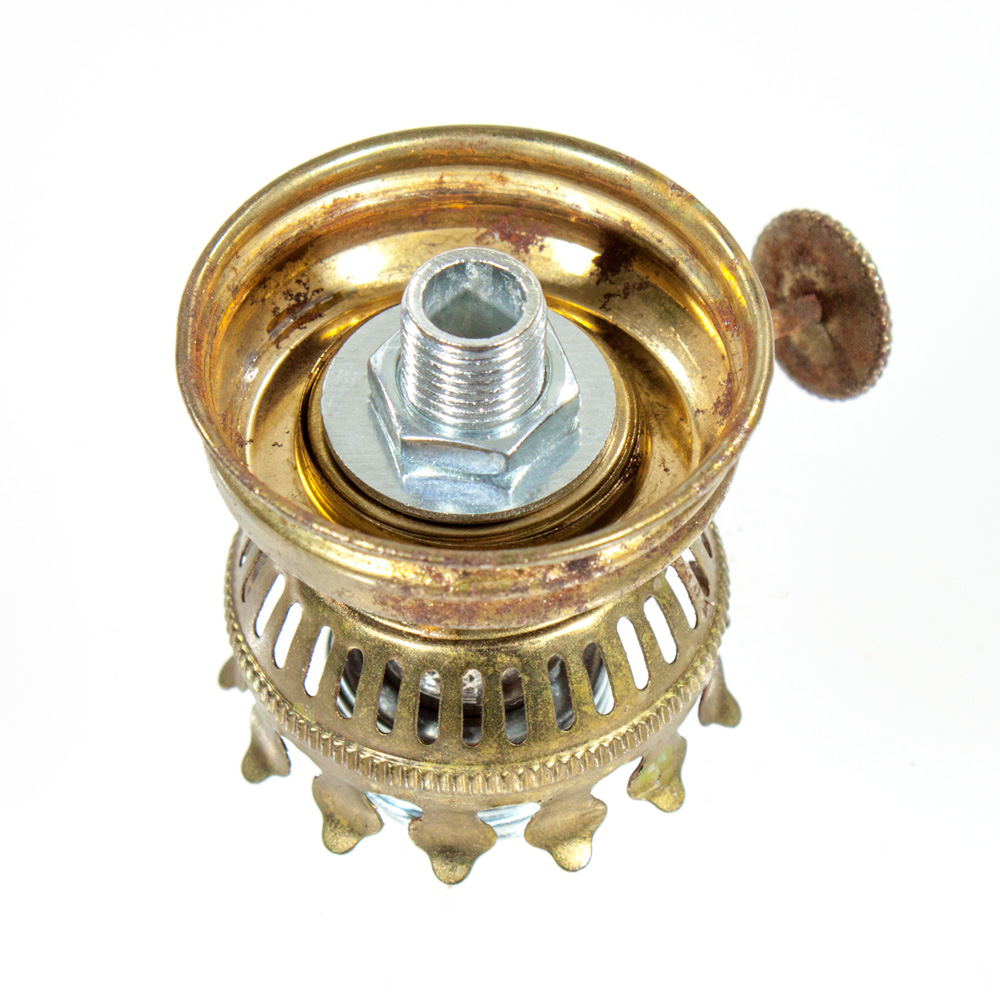
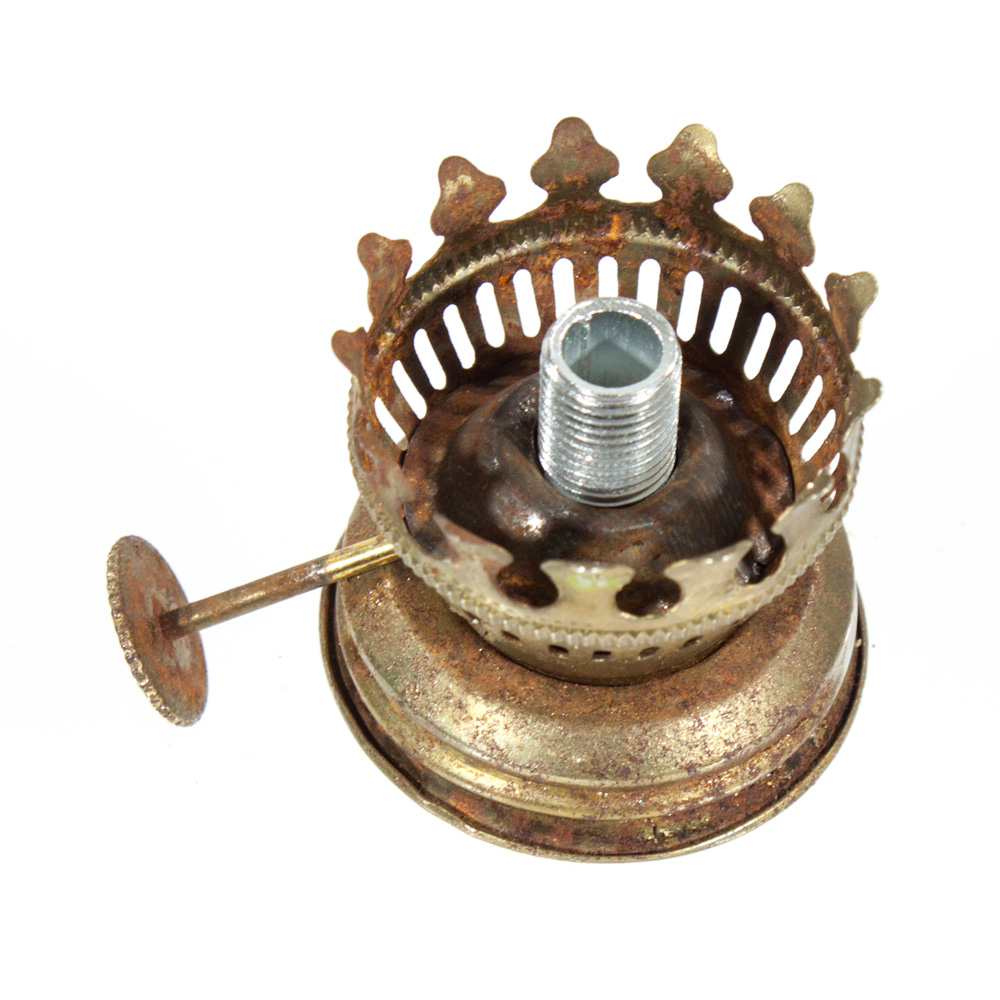
As you can see above i pushed the threaded rod through the hole and put a nut + washer underneath, the reason i did not put a nut on top is because the lampholder will do this job instead of a nut.
There are other ways you can do this like using a pottery nipple
However, the thread length was not long enough for this scenario, hence why we went for a threaded rod + nut.
We always recommend using a dab of super glue on the nut to lock it into position.
Once this is done, we can look at putting the lampholder on top, we decided to use a G9 as they are small lampholders and worked well for this demonstration.
So, we took the G9 holder again a dab of glue on the thread and simply screwed it on.

Note i had the knob for the wick that i had to also glue into position as it kept falling down, this will not be in use so glue was the best option, i used a hot glue via a gun for this as i can squish it all down.
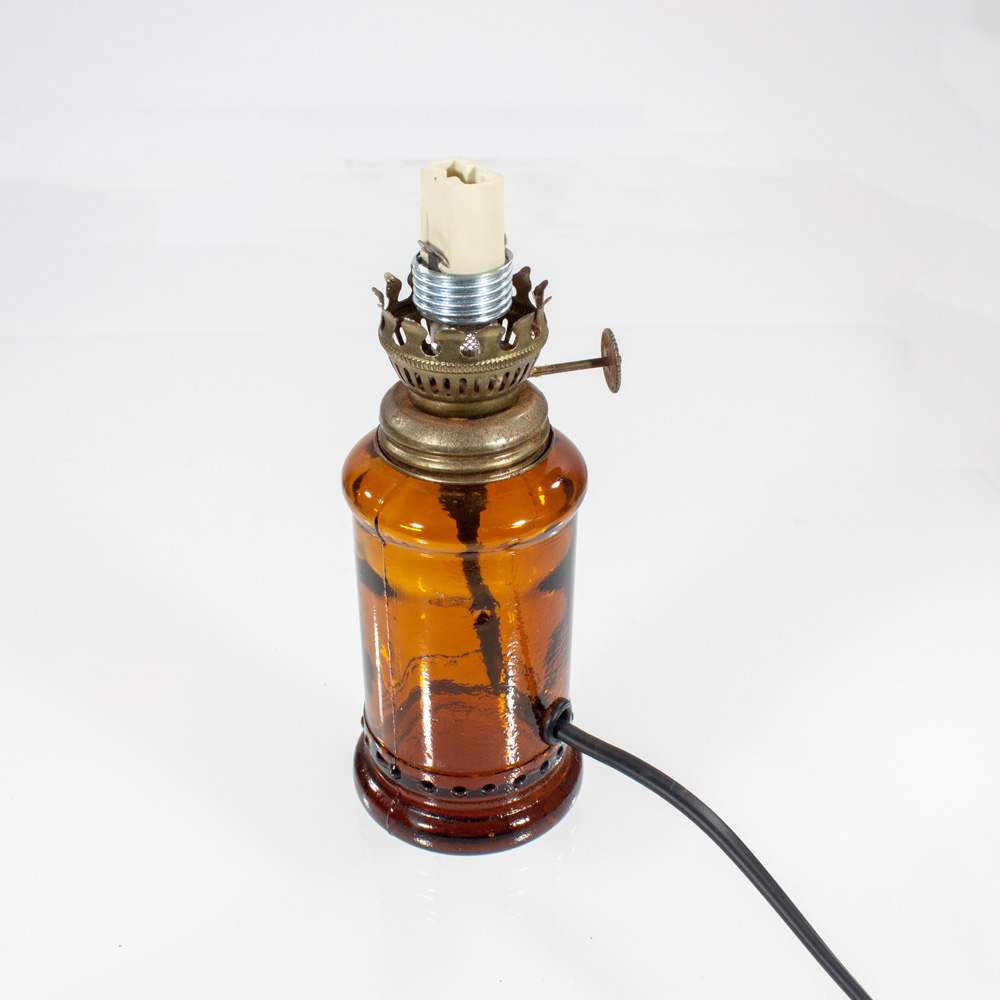
Once the lampholder is fixed into position, i then installed a cord grip onto the bottom of the fitting where the nut went (annoyingly i have no image of this step) you can see this location of the cord in following images.
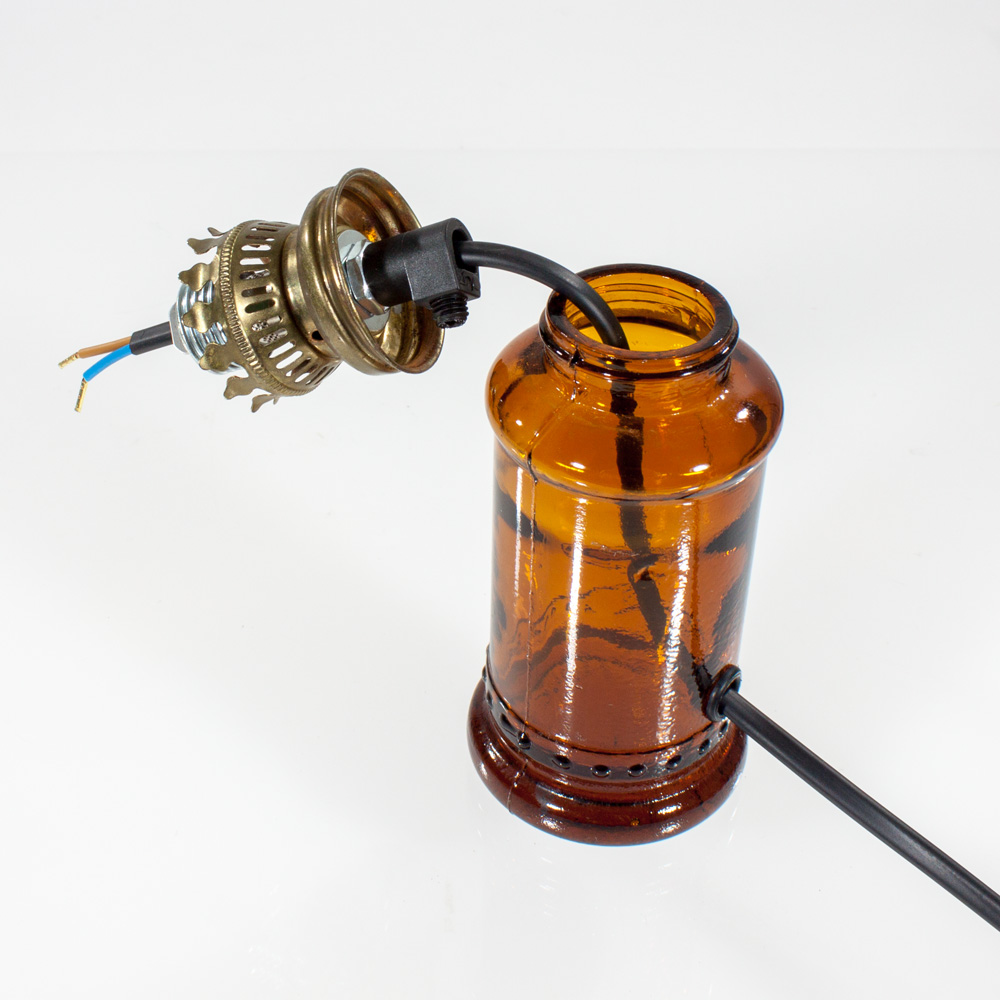
Grab the cable and push it through the bottle hole and out the top as shown below.

Once the cable is sticking out i then pushed the cable through the main assembly (note cord grip position mentioned earlier) the cord grip again was glued onto the end of the thread.
It does not matter which way around the wires go in the push fit connection.
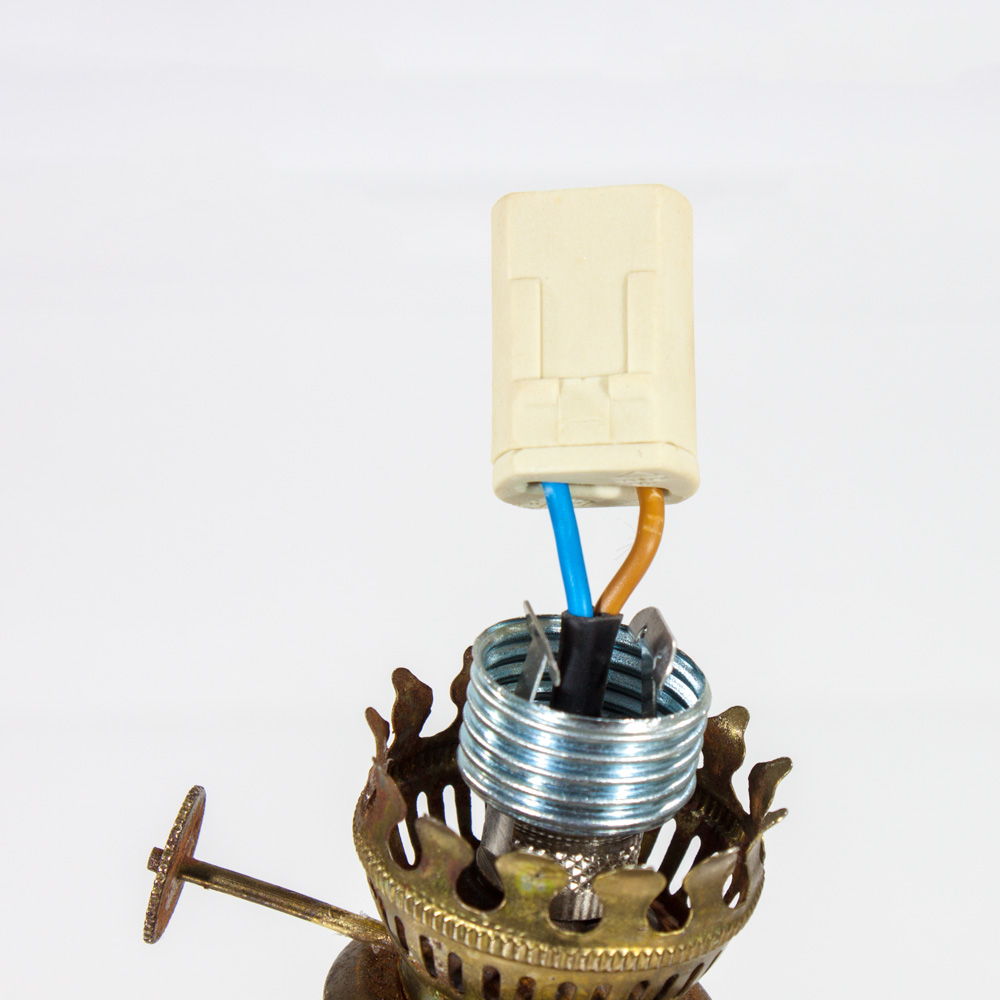
Once the cables have been connected, you can then push the ceramic insert into the lampholders base.
Then lay the assembly on the table and tighten the cord grip to prevent the cable from moving as shown below.

After this has been done, just doing check to ensure everything is tight and not going to move.
Then I carefully screwed the assembly onto the glass bottle, pulling the cable back out.
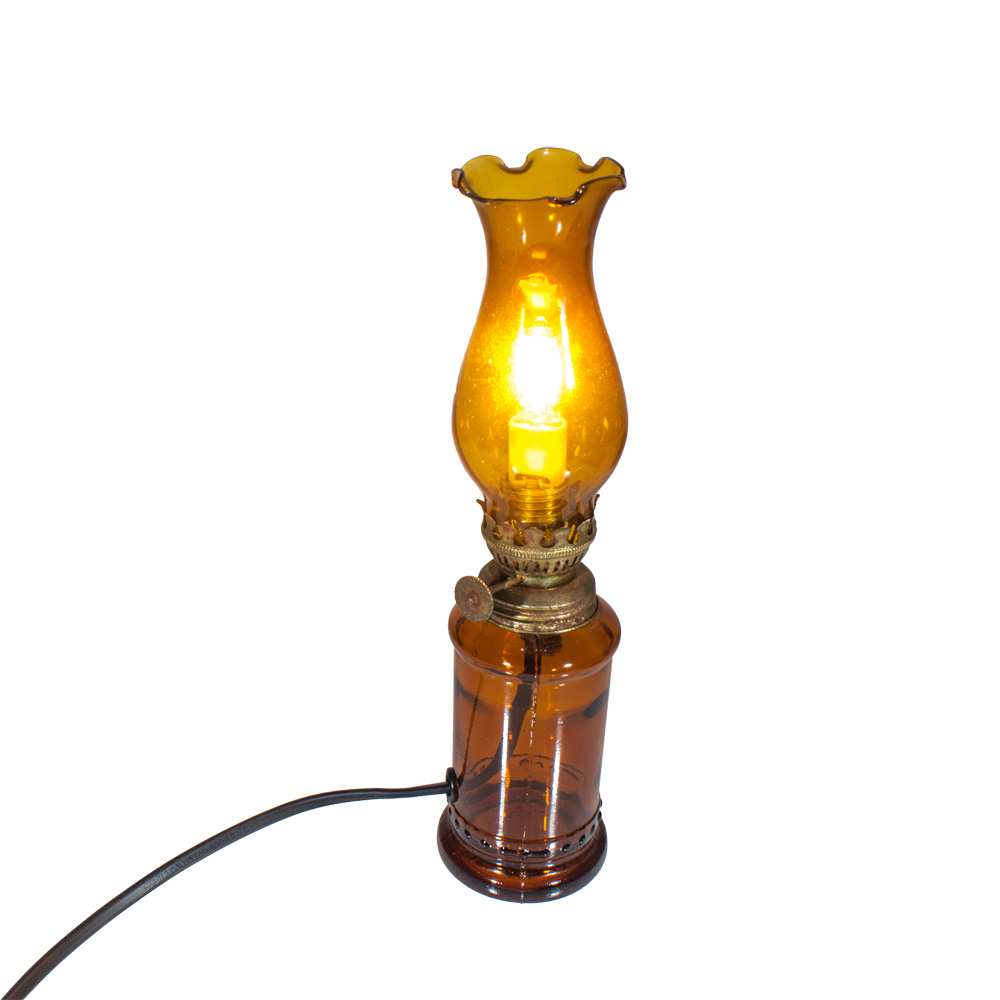
This then finished off the installation, all that was left to do was to place a lamp inside the holder and put the top glass on then test and confirm it’s safe to use.
0 out of 5 stars
| 5 Stars | 0% | |
| 4 Stars | 0% | |
| 3 Stars | 0% | |
| 2 Stars | 0% | |
| 1 Stars | 0% |