Welcome to our Support Portal. Search for answers using the search box below, or create a support ticket if you cannot find your answer.
-
Repairing a Lamp?
-
Product Info
-
-
- Installing Arditi Brand Metal E27 Lampholder's
- How to unlock my ES & SES Lampholder
- Installing Arditi Brand Plastic E27 lampholder's
- How to install our push fit E27 and E14 lampholders
- Wiring an E27 Pull cord Lampholder
- Wiring an E27 Switched Lampholder
- Installing S.Lilley Brand Metal E27 Lampholders
- How to Install our Lampholder Cup and Cord Grip
- Lampholder Bases explained
-
- Wiring A BC Un-Switched Lampholder
- Wiring An S.Lilley BC Switched Lampholder
- Wiring a Plastic BC Lampholder
- Installing the 40mm BC 4 Part Lampholder
- Wiring the BC Push Wire Plastic Snap on Cap Lampholder
- Safer switched lampholder not working
- Aligning a BC Unswitched Lampholder
- Lampholder Bases explained
-
-
- Kit 33 Installation Guide
- Kit 17 Installation Guide - ES Version
- Kit 32 Installation Guide
- Kit 21 Installation Guide
- Ceramic Side Entry Wiring Kit with a ES | E27 | Edison Screw Lampholder
- Ceramic Side Entry Wiring Kit with Unswitched BC | B22 Lampholder
- Kit 18 Installation Guide
- Kit 15 Installation Guide
- Kit 35 Installation Guide
- Plastic Wooden Table Lamp Fixing Kit With Backplate and Cover - BC Version
- Plastic Wooden Table Lamp Fixing Kit With Wood Nipple – BC Version
- Kit 12 Installation Guide
- Kit 11 Installation Guide
- Kit 8 Installation Guide
- Kit 1 Installation Guide
- Kit 21 Components
- Show Remaining Articles ( 1 ) Collapse Articles
-
-
Creating a Lamp?
-
- How to fix or install a lampholder onto a ceramic item with limited hand access.
- How to turn a bottle into a light fitting
- Measuring Bottle Hole For Bung Size
- Converting a Hong Kong Paraffin Lamp into a Table lamp
- Installing our ceiling roses
- How to Convert a Gas Blow Torch Into a Light Fitting
- How to repair a light that has a lamp inside and outside
-
-
Videos
Wiring our dimmers
0 out of 5 stars
| 5 Stars | 0% | |
| 4 Stars | 0% | |
| 3 Stars | 0% | |
| 2 Stars | 0% | |
| 1 Stars | 0% |
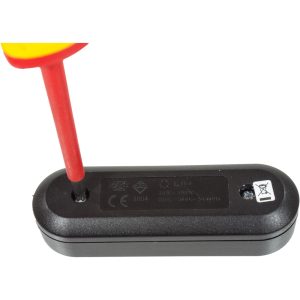
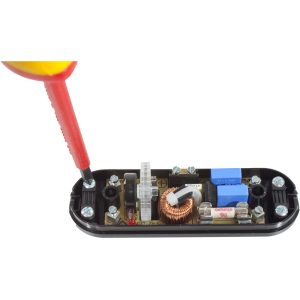
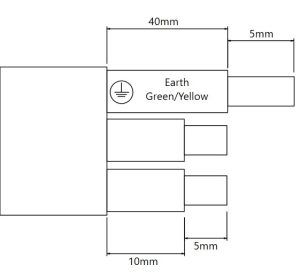
This guide is to help you wire our dimmers.
You can either scroll down this guide or click on the link below to jump to that section.
Table of Contents
Inline Rotary Style Dimmers
2 Step 2
3 Step 3
4 Step 4
5 Step 5
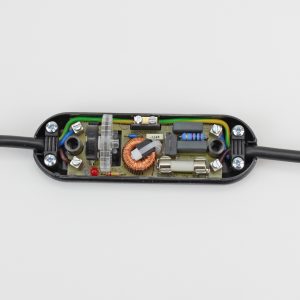
After wiring you will need to clamp the cable into position.
You must ensure that the outer PVC jacket of the cable is sitting under this strap when installing it back on, you must NOT have the 3 individual wires under the strap.
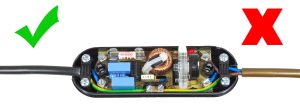
Images below show the correct and incorrect way of doing this task.
As you can see the cord grip on the left (Black) cable is correct, however the cord grip on the right hand side (gold) cable is not correct.
Inline LED Dimmers
2 Step 2
3 Step 3
4 Step 4
5 Step 5
After wiring you will need to clamp the cable into position.
You must ensure that the outer PVC jacket of the cable is sitting under this strap when installing it back on, you must NOT have the 3 individual wires under the strap.
Images below show the correct and incorrect way of doing this task.
As you can see the cord grip on the left (Black) cable is correct, however the cord grip on the right hand side (gold) cable is not correct.
Foot Floor Dimmers
1 Step 1
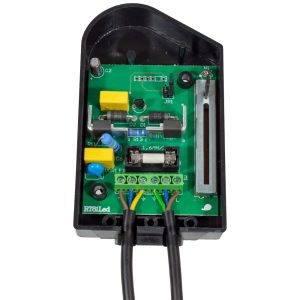
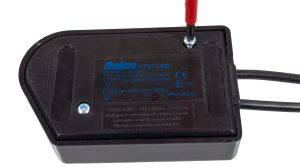
Separate the dimmer, the screws will not be in the back of the unit they come separately in a small bag.
2 Step 2
3 Step 3
4 Step 4
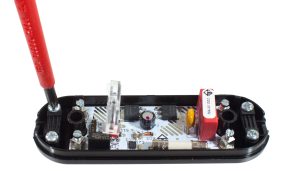
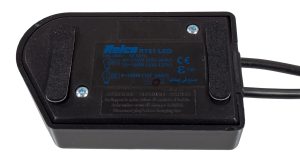
After wiring you will need to clamp the cable into position - clamps and screws are in the small bag of bits.
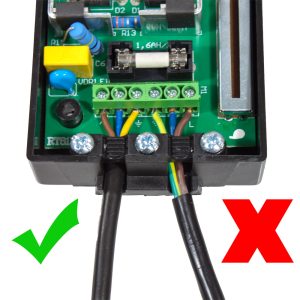
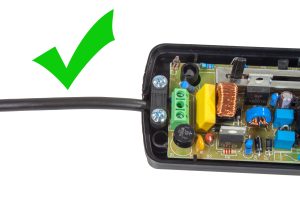
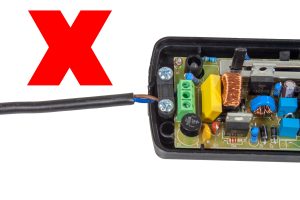
You must ensure that the outer PVC jacket of the cable is sitting under this strap when installing it back on, you must NOT have the 2 individual wires under the strap.
Image below show the correct and incorrect way of doing this task.
As you can see the left hand side is correct as the outer PVC jacket is sitting under the cord grip.
5 Step 5
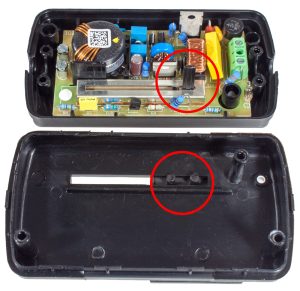
When placing the cover back onto the dimmer ensure the sliders are aligned.
1 Step 6
12v Dimmer
1 Step 1
Separate the dimmer, the screws will not be in the back of the unit they come separately in a small bag.
2 Step 2
3 Step 3
4 Step 4
After wiring you will need to clamp the cable into position - clamps and screws are in the small bag of bits.
You must ensure that the outer PVC jacket of the cable is sitting under this strap when installing it back on, you must NOT have the 2 individual wires under the strap.
Images below show the correct and incorrect way of doing this task.
2 Step 6
0 out of 5 stars
| 5 Stars | 0% | |
| 4 Stars | 0% | |
| 3 Stars | 0% | |
| 2 Stars | 0% | |
| 1 Stars | 0% |
